HTML 文本基础知识
HTML 的主要工作之一是提供文本结构,以便浏览器可以按照开发者想要的方式显示 HTML 文档。本文介绍了如何使用 HTML 通过添加标题和段落、强调单词、创建列表等来构建文本页面。
¥One of HTML's main jobs is to give text structure so that a browser can display an HTML document the way its developer intends. This article explains the way HTML can be used to structure a page of text by adding headings and paragraphs, emphasizing words, creating lists, and more.
| 先决条件: | 熟悉基本的 HTML,如 HTML 入门 中所述。 |
|---|---|
| 目标: | 了解如何标记基本的文本页面以赋予其结构和含义 - 包括段落、标题、列表、强调和引文。 |
基础知识:标题和段落
¥The basics: headings and paragraphs
大多数结构化文本都由标题和段落组成,无论你是在阅读故事、报纸、大学教科书、杂志等。
¥Most structured text consists of headings and paragraphs, whether you are reading a story, a newspaper, a college textbook, a magazine, etc.
结构化的内容使阅读体验更轻松、更愉快。
¥Structured content makes the reading experience easier and more enjoyable.
在 HTML 中,每个段落都必须包含在 <p> 元素中,如下所示:
¥In HTML, each paragraph has to be wrapped in a <p> element, like so:
<p>I am a paragraph, oh yes I am.</p>
每个标题都必须包含在标题元素中:
¥Each heading has to be wrapped in a heading element:
<h1>I am the title of the story.</h1>
有六个标题元素:h1、h2、h3、h4、h5 和 h6。每个元素代表文档中不同级别的内容;<h1> 代表主标题,<h2> 代表副标题,<h3> 代表副标题,依此类推。
¥There are six heading elements: h1, h2, h3, h4, h5, and h6. Each element represents a different level of content in the document; <h1> represents the main heading, <h2> represents subheadings, <h3> represents sub-subheadings, and so on.
实现结构层次结构
¥Implementing structural hierarchy
例如,在这个故事中,<h1> 元素代表故事的标题,<h2> 元素代表每章的标题,<h3> 元素代表每章的小节:
¥For example, in this story, the <h1> element represents the title of the story, the <h2> elements represent the title of each chapter, and the <h3> elements represent subsections of each chapter:
<h1>The Crushing Bore</h1>

<p>By Chris Mills</p>

<h2>Chapter 1: The dark night</h2>

<p>
  It was a dark night. Somewhere, an owl hooted. The rain lashed down on the…
</p>

<h2>Chapter 2: The eternal silence</h2>

<p>Our protagonist could not so much as a whisper out of the shadowy figure…</p>

<h3>The specter speaks</h3>

<p>
  Several more hours had passed, when all of a sudden the specter sat bolt
  upright and exclaimed, "Please have mercy on my soul!"
</p>
只要层次结构有意义,所涉及的元素代表什么实际上取决于你。在创建此类结构时,你只需要记住一些最佳实践:
¥It's really up to you what the elements involved represent, as long as the hierarchy makes sense. You just need to bear in mind a few best practices as you create such structures:
- 最好每页使用一个
<h1>— 这是顶层标题,所有其他标题位于层次结构中的下方。 - 确保在层次结构中按正确的顺序使用标题。不要使用
<h3>元素来表示副标题,然后使用<h2>元素来表示子副标题 - 这没有意义,并且会导致奇怪的结果。 - 在可用的六个标题级别中,除非你认为有必要,否则你的目标应该是每页使用不超过三个标题。具有多个级别(例如,较深的标题层次结构)的文档变得笨重且难以导航。在这种情况下,如果可能的话,建议将内容分布在多个页面上。
为什么我们需要结构?
¥Why do we need structure?
为了回答这个问题,让我们看一下 text-start.html - 本文运行示例的起点(一个很好的鹰嘴豆泥配方)。你应该在本地计算机上保存此文件的副本,因为稍后的练习将需要它。该文档的正文当前包含多个内容。它们没有以任何方式标记,但用换行符分隔(按下 Enter/Return 进入下一行)。
¥To answer this question, let's take a look at text-start.html—the starting point of our running example for this article (a nice hummus recipe). You should save a copy of this file on your local machine, as you'll need it for the exercises later on. This document's body currently contains multiple pieces of content. They aren't marked up in any way, but they are separated with line breaks (Enter/Return pressed to go onto the next line).
但是,当你在浏览器中打开文档时,你会看到文本显示为一大块!
¥However, when you open the document in your browser, you'll see that the text appears as a big chunk!
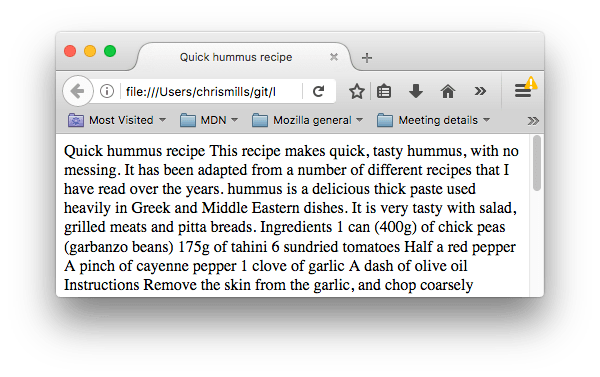
这是因为没有元素给出内容结构,因此浏览器不知道什么是标题,什么是段落。此外:
¥This is because there are no elements to give the content structure, so the browser does not know what is a heading and what is a paragraph. Furthermore:
- 查看网页的用户往往会快速浏览以查找相关内容,通常首先只是阅读标题。(我们通常是 在网页上花费很短的时间。)如果他们在几秒钟内看不到任何有用的东西,他们可能会感到沮丧并去其他地方。
- 为你的页面建立索引的搜索引擎将标题内容视为影响页面搜索排名的重要关键字。如果没有标题,你的页面在 SEO(搜索引擎优化)方面的表现将会很差。
- 严重视障人士通常不阅读网页;相反,他们听他们的。这是通过名为 屏幕阅读器 的软件完成的。该软件提供了快速访问给定文本内容的方法。在使用的各种技术中,它们通过读出标题来提供文档大纲,使用户能够快速找到所需的信息。如果没有标题,他们将被迫听大声朗读整个文档。
- 要使用 CSS 设计内容样式,或者使用 JavaScript 让它做有趣的事情,你需要有元素封装相关内容,以便 CSS/JavaScript 可以有效地定位它。
因此,我们需要给我们的内容结构标记。
¥Therefore, we need to give our content structural markup.
主动学习:给出我们的内容结构
¥Active learning: Giving our content structure
让我们直接看一个活生生的例子。在下面的示例中,将元素添加到输入字段中的原始文本,以便它在输出字段中显示为标题和两个段落。
¥Let's jump straight in with a live example. In the example below, add elements to the raw text in the Input field so that it appears as a heading and two paragraphs in the Output field.
如果你犯了错误,你可以随时使用“重置”按钮进行重置。如果你遇到困难,请按“显示解决方案”按钮查看答案。
¥If you make a mistake, you can always reset it using the Reset button. If you get stuck, press the Show solution button to see the answer.
<h2>Live output</h2>

<div class="output" style="min-height: 50px;"></div>

<h2>Editable code</h2>
<p class="a11y-label">
  Press Esc to move focus away from the code area (Tab inserts a tab character).
</p>

<textarea id="code" class="input" style="min-height: 100px; width: 95%">
My short story I am a statistician and my name is Trish.

My legs are made of cardboard and I am married to a fish.
</textarea>

<div class="playable-buttons">
  <input id="reset" type="button" value="Reset" />
  <input id="solution" type="button" value="Show solution" />
</div>
html {
  font-family: sans-serif;
}

h2 {
  font-size: 16px;
}

.a11y-label {
  margin: 0;
  text-align: right;
  font-size: 0.7rem;
  width: 98%;
}

body {
  margin: 10px;
  background: #f5f9fa;
}
const textarea = document.getElementById("code");
const reset = document.getElementById("reset");
const solution = document.getElementById("solution");
const output = document.querySelector(".output");
const code = textarea.value;
let userEntry = textarea.value;

function updateCode() {
  output.innerHTML = textarea.value;
}

const htmlSolution = `<h1>My short story</h1>
<p>
  I am a statistician and my name is Trish.
</p>
<p>
  My legs are made of cardboard and I am married to a fish.
</p>`;

let solutionEntry = htmlSolution;

reset.addEventListener("click", () => {
  textarea.value = code;
  userEntry = textarea.value;
  solutionEntry = htmlSolution;
  solution.value = "Show solution";
  updateCode();
});

solution.addEventListener("click", () => {
  if (solution.value === "Show solution") {
    textarea.value = solutionEntry;
    solution.value = "Hide solution";
  } else {
    textarea.value = userEntry;
    solution.value = "Show solution";
  }
  updateCode();
});

textarea.addEventListener("input", updateCode);
window.addEventListener("load", updateCode);

// Stop tab key tabbing out of textarea and
// make it write a tab at the caret position instead
textarea.onkeydown = (e) => {
  if (e.code === "Tab") {
    e.preventDefault();
    insertAtCaret("\t");
  }

  if (e.code === "Escape") {
    textarea.blur();
  }
};

function insertAtCaret(text) {
  const scrollPos = textarea.scrollTop;
  let caretPos = textarea.selectionStart;

  const front = textarea.value.substring(0, caretPos);
  const back = textarea.value.substring(
    textarea.selectionEnd,
    textarea.value.length,
  );
  textarea.value = front + text + back;
  caretPos += text.length;
  textarea.selectionStart = caretPos;
  textarea.selectionEnd = caretPos;
  textarea.focus();
  textarea.scrollTop = scrollPos;
}

// Update the saved userCode every time the user updates the text area code
textarea.onkeyup = function () {
  // We only want to save the state when the user code is being shown,
  // not the solution, so that solution is not saved over the user code
  if (solution.value === "Show solution") {
    userEntry = textarea.value;
  } else {
    solutionEntry = textarea.value;
  }

  updateCode();
};
为什么我们需要语义?
¥Why do we need semantics?
我们周围的任何地方都依赖语义 - 我们依靠以前的经验来告诉我们日常物品的功能是什么;当我们看到某物时,我们就知道它的功能是什么。例如,我们预计红色交通灯表示 "停止,",绿色交通灯表示 "去。" 如果应用了错误的语义,事情很快就会变得棘手。(是否有国家使用红色来表示 "go"?我们希望没有。)
¥Semantics are relied on everywhere around us—we rely on previous experience to tell us what the function of an everyday object is; when we see something, we know what its function will be. So, for example, we expect a red traffic light to mean "stop," and a green traffic light to mean "go." Things can get tricky very quickly if the wrong semantics are applied. (Do any countries use red to mean "go"? We hope not.)
同样,我们需要确保使用正确的元素,为我们的内容赋予正确的含义、功能或外观。在这种情况下,h1 元素也是一个语义元素,它赋予它围绕 "页面上的顶层标题。" 的角色(或含义)的文本
¥In a similar way, we need to make sure we are using the correct elements, giving our content the correct meaning, function, or appearance. In this context, the h1 element is also a semantic element, which gives the text it wraps around the role (or meaning) of "a top level heading on your page."
<h1>This is a top level heading</h1>
默认情况下,浏览器会给它一个大的字体大小,使其看起来像一个标题(尽管你可以使用 CSS 将其设置为你想要的任何样式)。更重要的是,它的语义价值将以多种方式使用,例如搜索引擎和屏幕阅读器(如上所述)。
¥By default, the browser will give it a large font size to make it look like a heading (although you could style it to look like anything you wanted using CSS). More importantly, its semantic value will be used in multiple ways, for example by search engines and screen readers (as mentioned above).
另一方面,你可以使任何元素看起来像顶层标题。考虑以下:
¥On the other hand, you could make any element look like a top level heading. Consider the following:
<span style="font-size: 32px; margin: 21px 0; display: block;">
  Is this a top level heading?
</span>
这是 <span> 元素。它没有语义。当你想要对其应用 CSS(或使用 JavaScript 对其进行某些操作)而不赋予其任何额外含义时,可以使用它来封装内容。(稍后你将在课程中了解有关这些的更多信息。)我们对其应用了一些 CSS,使其看起来像顶层标题,但由于它没有语义值,因此它不会获得上述任何额外好处。最好使用相关的 HTML 元素来完成这项工作。
¥This is a <span> element. It has no semantics. You use it to wrap content when you want to apply CSS to it (or do something to it with JavaScript) without giving it any extra meaning. (You'll find out more about these later on in the course.) We've applied some CSS to it to make it look like a top level heading, but since it has no semantic value, it will not get any of the extra benefits described above. It is a good idea to use the relevant HTML element for the job.
列表
¥Lists
现在让我们把注意力转向列表。生活中清单无处不在 - 从你的购物清单到你每天下意识回家的路线清单,再到你在这些教程中遵循的指示清单!在网络上,我们有三种类型的列表:无序、有序和描述。
¥Now let's turn our attention to lists. Lists are everywhere in life—from your shopping list to the list of directions you subconsciously follow to get to your house every day, to the lists of instructions you are following in these tutorials! On the web, we have three types of lists: unordered, ordered, and description.
无序列表和有序列表非常常见,本节将介绍它们。描述列表不太常见,我们将在 高级文本格式设置 中介绍它们。
¥Unordered and ordered lists are very common, and they're covered in this section. Description lists are less common, and we'll cover them in Advanced text formatting.
无序
¥Unordered
无序列表用于标记项目列表,其中项目的顺序无关紧要。我们以购物清单为例:
¥Unordered lists are used to mark up lists of items for which the order of the items doesn't matter. Let's take a shopping list as an example:
milk
eggs
bread
hummus
每个无序列表都以 <ul> 元素开始 - 这包含了所有列表项:
¥Every unordered list starts off with a <ul> element—this wraps around all the list items:
<ul>
  milk
  eggs
  bread
  hummus
</ul>
最后一步是将每个列表项封装在 <li>(列表项)元素中:
¥The last step is to wrap each list item in a <li> (list item) element:
<ul>
  <li>milk</li>
  <li>eggs</li>
  <li>bread</li>
  <li>hummus</li>
</ul>
主动学习:标记无序列表
¥Active learning: Marking up an unordered list
尝试编辑下面的实时示例来创建你自己的 HTML 无序列表。
¥Try editing the live sample below to create your very own HTML unordered list.
<h2>Live output</h2>

<div class="output" style="min-height: 50px;"></div>

<h2>Editable code</h2>
<p class="a11y-label">
  Press Esc to move focus away from the code area (Tab inserts a tab character).
</p>

<textarea id="code" class="input" style="min-height: 100px; width: 95%">
milk
eggs
bread
hummus
</textarea>

<div class="playable-buttons">
  <input id="reset" type="button" value="Reset" />
  <input id="solution" type="button" value="Show solution" />
</div>
html {
  font-family: sans-serif;
}

h2 {
  font-size: 16px;
}

.a11y-label {
  margin: 0;
  text-align: right;
  font-size: 0.7rem;
  width: 98%;
}

body {
  margin: 10px;
  background: #f5f9fa;
}
const textarea = document.getElementById("code");
const reset = document.getElementById("reset");
const solution = document.getElementById("solution");
const output = document.querySelector(".output");
const code = textarea.value;
let userEntry = textarea.value;

function updateCode() {
  output.innerHTML = textarea.value;
}

const htmlSolution =
  "<ul>\n<li>milk</li>\n<li>eggs</li>\n<li>bread</li>\n<li>hummus</li>\n</ul>";
let solutionEntry = htmlSolution;

reset.addEventListener("click", () => {
  textarea.value = code;
  userEntry = textarea.value;
  solutionEntry = htmlSolution;
  solution.value = "Show solution";
  updateCode();
});

solution.addEventListener("click", () => {
  if (solution.value === "Show solution") {
    textarea.value = solutionEntry;
    solution.value = "Hide solution";
  } else {
    textarea.value = userEntry;
    solution.value = "Show solution";
  }
  updateCode();
});

textarea.addEventListener("input", updateCode);
window.addEventListener("load", updateCode);

// stop tab key tabbing out of textarea and
// make it write a tab at the caret position instead

textarea.onkeydown = (e) => {
  if (e.code === "Tab") {
    e.preventDefault();
    insertAtCaret("\t");
  }

  if (e.code === "Escape") {
    textarea.blur();
  }
};

function insertAtCaret(text) {
  const scrollPos = textarea.scrollTop;
  let caretPos = textarea.selectionStart;

  const front = textarea.value.substring(0, caretPos);
  const back = textarea.value.substring(
    textarea.selectionEnd,
    textarea.value.length,
  );
  textarea.value = front + text + back;
  caretPos += text.length;
  textarea.selectionStart = caretPos;
  textarea.selectionEnd = caretPos;
  textarea.focus();
  textarea.scrollTop = scrollPos;
}

// Update the saved userCode every time the user updates the text area code
textarea.onkeyup = () => {
  // We only want to save the state when the user code is being shown,
  // not the solution, so that solution is not saved over the user code
  if (solution.value === "Show solution") {
    userEntry = textarea.value;
  } else {
    solutionEntry = textarea.value;
  }

  updateCode();
};
已订购
¥Ordered
有序列表是其中项目的顺序很重要的列表。我们以一组方向为例:
¥Ordered lists are lists in which the order of the items does matter. Let's take a set of directions as an example:
Drive to the end of the road
Turn right
Go straight across the first two roundabouts
Turn left at the third roundabout
The school is on your right, 300 meters up the road
标记结构与无序列表相同,只是你必须将列表项封装在 <ol> 元素中,而不是 <ul> 中:
¥The markup structure is the same as for unordered lists, except that you have to wrap the list items in an <ol> element, rather than <ul>:
<ol>
  <li>Drive to the end of the road</li>
  <li>Turn right</li>
  <li>Go straight across the first two roundabouts</li>
  <li>Turn left at the third roundabout</li>
  <li>The school is on your right, 300 meters up the road</li>
</ol>
主动学习:标记有序列表
¥Active learning: Marking up an ordered list
尝试编辑下面的实时示例来创建你自己的 HTML 排序列表。
¥Try editing the live sample below to create your very own HTML ordered list.
<h2>Live output</h2>

<div class="output" style="min-height: 50px;"></div>

<h2>Editable code</h2>
<p class="a11y-label">
  Press Esc to move focus away from the code area (Tab inserts a tab character).
</p>

<textarea id="code" class="input" style="min-height: 200px; width: 95%">
Drive to the end of the road
Turn right
Go straight across the first two roundabouts
Turn left at the third roundabout
The school is on your right, 300 meters up the road
</textarea>

<div class="playable-buttons">
  <input id="reset" type="button" value="Reset" />
  <input id="solution" type="button" value="Show solution" />
</div>
html {
  font-family: sans-serif;
}

h2 {
  font-size: 16px;
}

.a11y-label {
  margin: 0;
  text-align: right;
  font-size: 0.7rem;
  width: 98%;
}

body {
  margin: 10px;
  background: #f5f9fa;
}
const textarea = document.getElementById("code");
const reset = document.getElementById("reset");
const solution = document.getElementById("solution");
const output = document.querySelector(".output");
const code = textarea.value;
let userEntry = textarea.value;

function updateCode() {
  output.innerHTML = textarea.value;
}

const htmlSolution =
  "<ol>\n<li>Drive to the end of the road</li>\n<li>Turn right</li>\n<li>Go straight across the first two roundabouts</li>\n<li>Turn left at the third roundabout</li>\n<li>The school is on your right, 300 meters up the road</li>\n</ol>";
let solutionEntry = htmlSolution;

reset.addEventListener("click", () => {
  textarea.value = code;
  userEntry = textarea.value;
  solutionEntry = htmlSolution;
  solution.value = "Show solution";
  updateCode();
});

solution.addEventListener("click", () => {
  if (solution.value === "Show solution") {
    textarea.value = solutionEntry;
    solution.value = "Hide solution";
  } else {
    textarea.value = userEntry;
    solution.value = "Show solution";
  }
  updateCode();
});

textarea.addEventListener("input", updateCode);
window.addEventListener("load", updateCode);

// stop tab key tabbing out of textarea and
// make it write a tab at the caret position instead

textarea.onkeydown = (e) => {
  if (e.code === "Tab") {
    e.preventDefault();
    insertAtCaret("\t");
  }

  if (e.code === "Escape") {
    textarea.blur();
  }
};

function insertAtCaret(text) {
  const scrollPos = textarea.scrollTop;
  let caretPos = textarea.selectionStart;

  const front = textarea.value.substring(0, caretPos);
  const back = textarea.value.substring(
    textarea.selectionEnd,
    textarea.value.length,
  );
  textarea.value = front + text + back;
  caretPos += text.length;
  textarea.selectionStart = caretPos;
  textarea.selectionEnd = caretPos;
  textarea.focus();
  textarea.scrollTop = scrollPos;
}

// Update the saved userCode every time the user updates the text area code
textarea.onkeyup = () => {
  // We only want to save the state when the user code is being shown,
  // not the solution, so that solution is not saved over the user code
  if (solution.value === "Show solution") {
    userEntry = textarea.value;
  } else {
    solutionEntry = textarea.value;
  }

  updateCode();
};
主动学习:标记我们的秘诀页面
¥Active learning: Marking up our recipe page
因此,在本文的这一点上,你已拥有标记我们的秘诀页面示例所需的所有信息。你可以选择保存 text-start.html 起始文件的本地副本并在那里进行工作,或者在下面的可编辑示例中进行操作。在本地进行可能会更好,因为这样你就可以保存正在做的工作,而如果你将其填充到可编辑示例中,则下次打开页面时它将丢失。两者都有优点和缺点。
¥So at this point in the article, you have all the information you need to mark up our recipe page example. You can choose to either save a local copy of our text-start.html starting file and do the work there or do it in the editable example below. Doing it locally will probably be better, as then you'll get to save the work you are doing, whereas if you fill it in to the editable example, it will be lost the next time you open the page. Both have pros and cons.
<h2>Live output</h2>

<div class="output" style="min-height: 50px;"></div>

<h2>Editable code</h2>
<p class="a11y-label">
  Press Esc to move focus away from the code area (Tab inserts a tab character).
</p>

<textarea id="code" class="input" style="min-height: 200px; width: 95%">
Quick hummus recipe

  This recipe makes quick, tasty hummus, with no messing. It has been adapted from a number of different recipes that I have read over the years.

  Hummus is a delicious thick paste used heavily in Greek and Middle Eastern dishes. It is very tasty with salad, grilled meats and pitta breads.

  Ingredients

  1 can (400g) of chick peas (garbanzo beans)
  175g of tahini
  6 sundried tomatoes
  Half a red pepper
  A pinch of cayenne pepper
  1 clove of garlic
  A dash of olive oil

  Instructions

  Remove the skin from the garlic, and chop coarsely
  Remove all the seeds and stalk from the pepper, and chop coarsely
  Add all the ingredients into a food processor
  Process all the ingredients into a paste
  If you want a coarse "chunky" hummus, process it for a short time
  If you want a smooth hummus, process it for a longer time

  For a different flavor, you could try blending in a small measure of lemon and coriander, chili pepper, lime and chipotle, harissa and mint, or spinach and feta cheese. Experiment and see what works for you.

  Storage

  Refrigerate the finished hummus in a sealed container. You should be able to use it for about a week after you've made it. If it starts to become fizzy, you should definitely discard it.

  Hummus is suitable for freezing; you should thaw it and use it within a couple of months.
</textarea>

<div class="playable-buttons">
  <input id="reset" type="button" value="Reset" />
  <input id="solution" type="button" value="Show solution" />
</div>
html {
  font-family: sans-serif;
}

h2 {
  font-size: 16px;
}

.a11y-label {
  margin: 0;
  text-align: right;
  font-size: 0.7rem;
  width: 98%;
}

body {
  margin: 10px;
  background: #f5f9fa;
}
const textarea = document.getElementById("code");
const reset = document.getElementById("reset");
const solution = document.getElementById("solution");
const output = document.querySelector(".output");
const code = textarea.value;
let userEntry = textarea.value;

function updateCode() {
  output.innerHTML = textarea.value;
}

const htmlSolution =
  '<h1>Quick hummus recipe</h1>\n\n<p>This recipe makes quick, tasty hummus, with no messing. It has been adapted from a number of different recipes that I have read over the years.</p>\n\n<p>Hummus is a delicious thick paste used heavily in Greek and Middle Eastern dishes. It is very tasty with salad, grilled meats and pitta breads.</p>\n\n<h2>Ingredients</h2>\n\n<ul>\n<li>1 can (400g) of chick peas (garbanzo beans)</li>\n<li>175g of tahini</li>\n<li>6 sundried tomatoes</li>\n<li>Half a red pepper</li>\n<li>A pinch of cayenne pepper</li>\n<li>1 clove of garlic</li>\n<li>A dash of olive oil</li>\n</ul>\n\n<h2>Instructions</h2>\n\n<ol>\n<li>Remove the skin from the garlic, and chop coarsely.</li>\n<li>Remove all the seeds and stalk from the pepper, and chop coarsely.</li>\n<li>Add all the ingredients into a food processor.</li>\n<li>Process all the ingredients into a paste.</li>\n<li>If you want a coarse "chunky" hummus, process it for a short time.</li>\n<li>If you want a smooth hummus, process it for a longer time.</li>\n</ol>\n\n<p>For a different flavor, you could try blending in a small measure of lemon and coriander, chili pepper, lime and chipotle, harissa and mint, or spinach and feta cheese. Experiment and see what works for you.</p>\n\n<h2>Storage</h2>\n\n<p>Refrigerate the finished hummus in a sealed container. You should be able to use it for about a week after you\'ve made it. If it starts to become fizzy, you should definitely discard it.</p>\n\n<p>Hummus is suitable for freezing; you should thaw it and use it within a couple of months.</p>';
let solutionEntry = htmlSolution;

reset.addEventListener("click", () => {
  textarea.value = code;
  userEntry = textarea.value;
  solutionEntry = htmlSolution;
  solution.value = "Show solution";
  updateCode();
});

solution.addEventListener("click", () => {
  if (solution.value === "Show solution") {
    textarea.value = solutionEntry;
    solution.value = "Hide solution";
  } else {
    textarea.value = userEntry;
    solution.value = "Show solution";
  }
  updateCode();
});

textarea.addEventListener("input", updateCode);
window.addEventListener("load", updateCode);

// stop tab key tabbing out of textarea and
// make it write a tab at the caret position instead

textarea.onkeydown = (e) => {
  if (e.code === "Tab") {
    e.preventDefault();
    insertAtCaret("\t");
  }

  if (e.code === "Escape") {
    textarea.blur();
  }
};

function insertAtCaret(text) {
  const scrollPos = textarea.scrollTop;
  let caretPos = textarea.selectionStart;

  const front = textarea.value.substring(0, caretPos);
  const back = textarea.value.substring(
    textarea.selectionEnd,
    textarea.value.length,
  );
  textarea.value = front + text + back;
  caretPos += text.length;
  textarea.selectionStart = caretPos;
  textarea.selectionEnd = caretPos;
  textarea.focus();
  textarea.scrollTop = scrollPos;
}

// Update the saved userCode every time the user updates the text area code
textarea.onkeyup = () => {
  // We only want to save the state when the user code is being shown,
  // not the solution, so that solution is not saved over the user code
  if (solution.value === "Show solution") {
    userEntry = textarea.value;
  } else {
    solutionEntry = textarea.value;
  }

  updateCode();
};
如果你遇到困难,可以随时按“显示解决方案”按钮,或查看 GitHub 存储库上的 text-complete.html 示例。
¥If you get stuck, you can always press the Show solution button, or check out our text-complete.html example on our GitHub repo.
嵌套列表
¥Nesting lists
将一个列表嵌套在另一个列表中是完全可以的。你可能希望在顶层项目符号下方放置一些子项目符号。让我们从秘诀示例中获取第二个列表:
¥It is perfectly OK to nest one list inside another one. You might want to have some sub-bullets sitting below a top-level bullet. Let's take the second list from our recipe example:
<ol>
  <li>Remove the skin from the garlic, and chop coarsely.</li>
  <li>Remove all the seeds and stalk from the pepper, and chop coarsely.</li>
  <li>Add all the ingredients into a food processor.</li>
  <li>Process all the ingredients into a paste.</li>
  <li>If you want a coarse "chunky" hummus, process it for a short time.</li>
  <li>If you want a smooth hummus, process it for a longer time.</li>
</ol>
由于最后两个项目符号与前面的项目符号非常密切相关(它们读起来就像适合该项目符号下方的子指令或选择),因此将它们嵌套在它们自己的无序列表中并将该列表放入当前的第四个列表中可能是有意义的 子弹。这看起来像这样:
¥Since the last two bullets are very closely related to the one before them (they read like sub-instructions or choices that fit below that bullet), it might make sense to nest them inside their own unordered list and put that list inside the current fourth bullet. This would look like so:
<ol>
  <li>Remove the skin from the garlic, and chop coarsely.</li>
  <li>Remove all the seeds and stalk from the pepper, and chop coarsely.</li>
  <li>Add all the ingredients into a food processor.</li>
  <li>
    Process all the ingredients into a paste.
    <ul>
      <li>
        If you want a coarse "chunky" hummus, process it for a short time.
      </li>
      <li>If you want a smooth hummus, process it for a longer time.</li>
    </ul>
  </li>
</ol>
尝试回到之前的主动学习示例并像这样更新第二个列表。
¥Try going back to the previous active learning example and updating the second list like this.
重点和重要性
¥Emphasis and importance
在人类语言中,我们经常强调某些单词来改变句子的含义,并且我们经常希望以某种方式将某些单词标记为重要或不同。HTML 提供了各种语义元素,使我们能够用此类效果标记文本内容,在本节中,我们将介绍一些最常见的元素。
¥In human language, we often emphasize certain words to alter the meaning of a sentence, and we often want to mark certain words as important or different in some way. HTML provides various semantic elements to allow us to mark up textual content with such effects, and in this section, we'll look at a few of the most common ones.
强调
¥Emphasis
当我们想要强调口语时,我们会强调某些单词,从而巧妙地改变我们所说内容的含义。同样,在书面语言中,我们倾向于用斜体来强调单词。例如,下面两个句子就有不同的含义。
¥When we want to add emphasis in spoken language, we stress certain words, subtly altering the meaning of what we are saying. Similarly, in written language we tend to stress words by putting them in italics. For example, the following two sentences have different meanings.
我很高兴你没有迟到。
¥I am glad you weren't late.
我很高兴你没有迟到。
¥I am glad you weren't late.
第一句话听起来真的让人松了口气,因为这个人没有迟到。相比之下,第二个单词“"glad"”和“"late"”都是斜体,听起来很讽刺或消极攻击,表达了对该人迟到了一点的恼火。
¥The first sentence sounds genuinely relieved that the person wasn't late. In contrast, the second one, with both the words "glad" and "late" in italics, sounds sarcastic or passive-aggressive, expressing annoyance that the person arrived a bit late.
在 HTML 中,我们使用 <em>(强调)元素来标记此类实例。除了使文档阅读起来更有趣之外,屏幕阅读器还可以识别这些内容,并且可以将其配置为以不同的语气朗读它们。默认情况下,浏览器将其设置为斜体样式,但你不应纯粹使用此标记来获得斜体样式。为此,你可以使用 <span> 元素和一些 CSS,或者可能使用 <i> 元素(见下文)。
¥In HTML we use the <em> (emphasis) element to mark up such instances. As well as making the document more interesting to read, these are recognized by screen readers, which can be configured to speak them in a different tone of voice. Browsers style this as italic by default, but you shouldn't use this tag purely to get italic styling. To do that, you'd use a <span> element and some CSS, or perhaps an <i> element (see below).
<p>I am <em>glad</em> you weren't <em>late</em>.</p>
重要性很强
¥Strong importance
为了强调重要的单词,我们倾向于在口语中强调它们,在书面语言中将它们加粗。例如:
¥To emphasize important words, we tend to stress them in spoken language and bold them in written language. For example:
这种液体有剧毒。
¥This liquid is highly toxic.
我指望你了。不要迟到!
¥I am counting on you. Do not be late!
在 HTML 中,我们使用 <strong>(强重要性)元素来标记此类实例。除了使文档更有用之外,屏幕阅读器还能识别这些内容,可以将其配置为以不同的语气朗读它们。默认情况下,浏览器将其设置为粗体文本,但你不应纯粹使用此标记来获得粗体样式。为此,你可以使用 <span> 元素和一些 CSS,或者可能使用 <b> 元素(见下文)。
¥In HTML we use the <strong> (strong importance) element to mark up such instances. As well as making the document more useful, again these are recognized by screen readers, which can be configured to speak them in a different tone of voice. Browsers style this as bold text by default, but you shouldn't use this tag purely to get bold styling. To do that, you'd use a <span> element and some CSS, or perhaps a <b> element (see below).
<p>This liquid is <strong>highly toxic</strong>.</p>

<p>I am counting on you. <strong>Do not</strong> be late!</p>
如果需要,你可以将“强”和“强调”嵌套在一起:
¥You can nest strong and emphasis inside one another if desired:
<p>This liquid is <strong>highly toxic</strong> — if you drink it, <strong>you may <em>die</em></strong>.</p>
主动学习:让我们变得重要
¥Active learning: Let's be important
在这个主动学习部分中,我们提供了一个可编辑的示例。在其中,我们希望你尝试对你认为需要的单词添加强调和强烈重要性,只是为了进行一些练习。
¥In this active learning section, we've provided an editable example. Inside it, we'd like you to try adding emphasis and strong importance to the words you think need them, just to have some practice.
<h2>Live output</h2>

<div class="output" style="min-height: 50px;"></div>

<h2>Editable code</h2>
<p class="a11y-label">
  Press Esc to move focus away from the code area (Tab inserts a tab character).
</p>

<textarea id="code" class="input" style="min-height: 200px; width: 95%">
<h1>Important notice</h1>
<p>On Sunday January 9th 2010, a gang of goths were
  spotted stealing several garden gnomes from a
  shopping center in downtown Milwaukee. They were
  all wearing green jumpsuits and silly hats, and
  seemed to be having a whale of a time. If anyone
   has any information about this incident, please
    contact the police now.</p>
</textarea>

<div class="playable-buttons">
  <input id="reset" type="button" value="Reset" />
  <input id="solution" type="button" value="Show solution" />
</div>
html {
  font-family: sans-serif;
}

h2 {
  font-size: 16px;
}

.a11y-label {
  margin: 0;
  text-align: right;
  font-size: 0.7rem;
  width: 98%;
}

body {
  margin: 10px;
  background: #f5f9fa;
}
const textarea = document.getElementById("code");
const reset = document.getElementById("reset");
const solution = document.getElementById("solution");
const output = document.querySelector(".output");
const code = textarea.value;
let userEntry = textarea.value;

function updateCode() {
  output.innerHTML = textarea.value;
}

const htmlSolution =
  "<h1>Important notice</h1>\n<p>On <strong>Sunday January 9th 2010</strong>, a gang of <em>goths</em> were spotted stealing <strong><em>several</em> garden gnomes</strong> from a shopping center in downtown <strong>Milwaukee</strong>. They were all wearing <em>green jumpsuits</em> and <em>silly hats</em>, and seemed to be having a whale of a time. If anyone has <strong>any</strong> information about this incident, please contact the police <strong>now</strong>.</p>";
let solutionEntry = htmlSolution;

reset.addEventListener("click", () => {
  textarea.value = code;
  userEntry = textarea.value;
  solutionEntry = htmlSolution;
  solution.value = "Show solution";
  updateCode();
});

solution.addEventListener("click", () => {
  if (solution.value === "Show solution") {
    textarea.value = solutionEntry;
    solution.value = "Hide solution";
  } else {
    textarea.value = userEntry;
    solution.value = "Show solution";
  }
  updateCode();
});

textarea.addEventListener("input", updateCode);
window.addEventListener("load", updateCode);

// Stop tab key tabbing out of textarea and
// make it write a tab at the caret position instead
textarea.onkeydown = (e) => {
  if (e.code === "Tab") {
    e.preventDefault();
    insertAtCaret("\t");
  }

  if (e.code === "Escape") {
    textarea.blur();
  }
};

function insertAtCaret(text) {
  const scrollPos = textarea.scrollTop;
  let caretPos = textarea.selectionStart;

  const front = textarea.value.substring(0, caretPos);
  const back = textarea.value.substring(
    textarea.selectionEnd,
    textarea.value.length,
  );
  textarea.value = front + text + back;
  caretPos += text.length;
  textarea.selectionStart = caretPos;
  textarea.selectionEnd = caretPos;
  textarea.focus();
  textarea.scrollTop = scrollPos;
}

// Update the saved userCode every time the user updates the text area code
textarea.onkeyup = () => {
  // We only want to save the state when the user code is being shown,
  // not the solution, so that solution is not saved over the user code
  if (solution.value === "Show solution") {
    userEntry = textarea.value;
  } else {
    solutionEntry = textarea.value;
  }

  updateCode();
};
斜体、粗体、下划线……
¥Italic, bold, underline…
到目前为止我们讨论的元素都有明确的关联语义。<b>、<i>、<u> 的情况稍微复杂一些。它们的出现是为了让人们可以在 CSS 仍然得不到很好的支持或根本不支持的时代书写粗体、斜体或带下划线的文本。像这样的元素只影响表示而不影响语义,被称为表示元素,不应该再使用,因为正如我们之前所看到的,语义对于可访问性、SEO 等非常重要。
¥The elements we've discussed so far have clear-cut associated semantics. The situation with <b>, <i>, and <u> is somewhat more complicated. They came about so people could write bold, italics, or underlined text in an era when CSS was still supported poorly or not at all. Elements like this, which only affect presentation and not semantics, are known as presentational elements and should no longer be used because, as we've seen before, semantics is so important to accessibility, SEO, etc.
HTML5 使用新的、有些令人困惑的语义角色重新定义了 <b>、<i> 和 <u>。
¥HTML5 redefined <b>, <i>, and <u> with new, somewhat confusing, semantic roles.
这是你能记住的最佳规则:只有在没有更合适的元素时,才适合使用 <b>、<i> 或 <u> 来表达传统上用粗体、斜体或下划线表达的含义;通常是有的。考虑 <strong>、<em>、<mark> 或 <span> 是否更合适。
¥Here's the best rule you can remember: It's only appropriate to use <b>, <i>, or <u> to convey a meaning traditionally conveyed with bold, italics, or underline when there isn't a more suitable element; and there usually is. Consider whether <strong>, <em>, <mark>, or <span> might be more appropriate.
始终保持无障碍心态。斜体的概念对于使用屏幕阅读器的人或使用拉丁字母以外的书写系统的人来说没有多大帮助。
¥Always keep an accessibility mindset. The concept of italics isn't very helpful to people using screen readers, or to people using a writing system other than the Latin alphabet.
<i>用于传达传统上由斜体传达的含义:外来词、分类名称、技术术语、想法……<b>用于传达传统上用粗体传达的含义:关键词、产品名称、引导句……<u>用于传达传统上通过下划线传达的含义:正确的名称、拼写错误...
注意:人们将下划线与超链接紧密联系在一起。因此,在网络上,最好只在链接下划线。当语义合适时使用
<u>元素,但考虑使用 CSS 将默认下划线更改为更适合 Web 的内容。下面的例子说明了如何做到这一点。¥Note: People strongly associate underlining with hyperlinks. Therefore, on the web, it's best to only underline links. Use the
<u>element when it's semantically appropriate, but consider using CSS to change the default underline to something more appropriate on the web. The example below illustrates how it can be done.
<!-- scientific names -->
<p>
  The Ruby-throated Hummingbird (<i>Archilochus colubris</i>) is the most common
  hummingbird in Eastern North America.
</p>

<!-- foreign words -->
<p>
  The menu was a sea of exotic words like <i lang="uk-latn">vatrushka</i>,
  <i lang="id">nasi goreng</i> and <i lang="fr">soupe à l'oignon</i>.
</p>

<!-- a known misspelling -->
<p>Someday I'll learn how to <u class="spelling-error">spel</u> better.</p>

<!-- term being defined when used in a definition -->
<dl>
  <dt>Semantic HTML</dt>
  <dd>
    Use the elements based on their <b>semantic</b> meaning, not their
    appearance.
  </dd>
</dl>
测试你的技能!
¥Test your skills!
你已读完本文,但你还记得最重要的信息吗?在继续之前,你可以找到一些进一步的测试来验证你是否已保留此信息 - 请参阅 测试你的技能:HTML 文本基础知识。
¥You've reached the end of this article, but can you remember the most important information? You can find some further tests to verify that you've retained this information before you move on — see Test your skills: HTML text basics.
概括
¥Summary
现在就这样了!本文应该让你很好地了解如何开始在 HTML 中标记文本,并向你介绍该字段的一些最重要的元素。该字段还有更多语义元素需要介绍,我们将在课程后面的 高级文本格式设置 文章中介绍更多内容。在下一篇文章中,我们将详细介绍如何 创建超链接,这可能是网络上最重要的元素。
¥That's it for now! This article should have given you a good idea of how to start marking up text in HTML and introduced you to some of the most important elements in this area. There are a lot more semantic elements to cover in this area, and we'll look at a lot more in our Advanced text formatting article later on in the course. In the next article, we'll be looking in detail at how to create hyperlinks, possibly the most important element on the web.