第三方 API
到目前为止,我们介绍的 API 都内置于浏览器中,但并非所有 API 都是内置的。许多大型网站和服务(例如 Google 地图、Twitter、Facebook、PayPal 等)都提供 API,允许开发者利用他们的数据(例如在博客上显示你的 Twitter 流)或服务(例如使用 Facebook 登录来登录你的用户) )。本文着眼于浏览器 API 和第 3 方 API 之间的差异,并展示后者的一些典型用法。
¥The APIs we've covered so far are built into the browser, but not all APIs are. Many large websites and services such as Google Maps, Twitter, Facebook, PayPal, etc. provide APIs allowing developers to make use of their data (e.g. displaying your twitter stream on your blog) or services (e.g. using Facebook login to log in your users). This article looks at the difference between browser APIs and 3rd party APIs and shows some typical uses of the latter.
| 先决条件: | JavaScript 基础知识(参见 第一步、 架构模块、 JavaScript 对象)、 客户端 API 基础知识 |
|---|---|
| 目标: | 了解第三方 API 的工作原理以及如何使用它们来增强你的网站。 |
什么是第三方 API?
¥What are third party APIs?
第三方 API 是由第三方(通常是 Facebook、Twitter 或 Google 等公司)提供的 API,允许你通过 JavaScript 访问其功能并在你的网站上使用它。最明显的示例之一是使用地图 API 在页面上显示自定义地图。
¥Third party APIs are APIs provided by third parties — generally companies such as Facebook, Twitter, or Google — to allow you to access their functionality via JavaScript and use it on your site. One of the most obvious examples is using mapping APIs to display custom maps on your pages.
让我们看一下 简单的 Mapquest API 示例,并用它来说明第三方 API 与浏览器 API 的区别。
¥Let's look at a Simple Mapquest API example, and use it to illustrate how third-party APIs differ from browser APIs.
注意:你可能只想一次 获取我们所有的代码示例,在这种情况下,你可以在存储库中搜索每个部分所需的示例文件。
¥Note: You might want to just get all our code examples at once, in which case you can then just search the repo for the example files you need in each section.
它们可以在第三方服务器上找到
¥They are found on third-party servers
浏览器 API 内置于浏览器中 - 你可以立即从 JavaScript 访问它们。例如,我们 在介绍文章中看到 的 Web Audio API 是使用原生 AudioContext 对象访问的。例如:
¥Browser APIs are built into the browser — you can access them from JavaScript immediately. For example, the Web Audio API we saw in the Introductory article is accessed using the native AudioContext object. For example:
const audioCtx = new AudioContext();
// …
const audioElement = document.querySelector("audio");
// …
const audioSource = audioCtx.createMediaElementSource(audioElement);
// etc.
另一方面,第三方 API 位于第三方服务器上。要从 JavaScript 访问它们,你首先需要连接到 API 功能并使其在你的页面上可用。这通常涉及首先通过 <script> 元素链接到服务器上可用的 JavaScript 库,如我们的 Mapquest 示例所示:
¥Third party APIs, on the other hand, are located on third party servers. To access them from JavaScript you first need to connect to the API functionality and make it available on your page. This typically involves first linking to a JavaScript library available on the server via a <script> element, as seen in our Mapquest example:
<script
  src="https://api.mqcdn.com/sdk/mapquest-js/v1.3.2/mapquest.js"
  defer></script>
<link
  rel="stylesheet"
  href="https://api.mqcdn.com/sdk/mapquest-js/v1.3.2/mapquest.css" />
然后你可以开始使用该库中可用的对象。例如:
¥You can then start using the objects available in that library. For example:
const map = L.mapquest.map("map", {
  center: [53.480759, -2.242631],
  layers: L.mapquest.tileLayer("map"),
  zoom: 12,
});
这里我们创建一个变量来存储地图信息,然后使用 mapquest.map() 方法创建一个新地图,该方法将要在 ('map') 中显示地图的 <div> 元素的 ID 作为其参数,以及一个包含 我们想要显示的特定地图的详细信息。在本例中,我们指定地图中心的坐标、要显示的 map 类型的地图图层(使用 mapquest.tileLayer() 方法创建)以及默认缩放级别。
¥Here we are creating a variable to store the map information in, then creating a new map using the mapquest.map() method, which takes as its parameters the ID of a <div> element you want to display the map in ('map'), and an options object containing the details of the particular map we want to display. In this case we specify the coordinates of the center of the map, a map layer of type map to show (created using the mapquest.tileLayer() method), and the default zoom level.
这是 Mapquest API 绘制简单地图所需的所有信息。你连接到的服务器处理所有复杂的事情,例如显示所显示区域的正确地图图块等。
¥This is all the information the Mapquest API needs to plot a simple map. The server you are connecting to handles all the complicated stuff, like displaying the correct map tiles for the area being shown, etc.
注意:某些 API 处理对其功能的访问略有不同,要求开发者向特定 URL 模式发出 HTTP 请求以检索数据。这些被称为 RESTful API - 稍后我们将展示一个示例。
¥Note: Some APIs handle access to their functionality slightly differently, requiring the developer to make an HTTP request to a specific URL pattern to retrieve data. These are called RESTful APIs — we'll show an example later on.
他们通常需要 API 密钥
¥They usually require API keys
浏览器 API 的安全性往往通过权限提示来处理,如 我们在第一篇文章中讨论过。这样做的目的是让用户了解他们访问的网站中发生了什么,并且不太可能成为恶意使用 API 的人的受害者。
¥Security for browser APIs tends to be handled by permission prompts, as discussed in our first article. The purpose of these is so that the user knows what is going on in the websites they visit and is less likely to fall victim to someone using an API in a malicious way.
第三方 API 的权限系统略有不同 - 它们倾向于使用开发者密钥来允许开发者访问 API 功能,这更多的是保护 API 供应商而不是用户。
¥Third party APIs have a slightly different permissions system — they tend to use developer keys to allow developers access to the API functionality, which is more to protect the API vendor than the user.
你将在 Mapquest API 示例中找到类似于以下内容的行:
¥You'll find a line similar to the following in the Mapquest API example:
L.mapquest.key = "YOUR-API-KEY-HERE";
此行指定要在应用中使用的 API 或开发者密钥 - 应用的开发者必须申请获取密钥,然后将其包含在其代码中才能允许访问 API 的功能。在我们的示例中,我们刚刚提供了一个占位符。
¥This line specifies an API or developer key to use in your application — the developer of the application must apply to get a key, and then include it in their code to be allowed access to the API's functionality. In our example we've just provided a placeholder.
注意:创建自己的示例时,你将使用自己的 API 密钥来代替任何占位符。
¥Note: When creating your own examples, you'll use your own API key in place of any placeholder.
其他 API 可能要求你以稍微不同的方式包含密钥,但大多数 API 的模式相对相似。
¥Other APIs may require that you include the key in a slightly different way, but the pattern is relatively similar for most of them.
需要密钥使 API 提供商能够让 API 用户对其操作负责。当开发者注册了密钥后,API 提供商就会知道他们,如果他们开始使用 API 进行任何恶意行为(例如跟踪人们的位置或尝试向 API 发送大量请求),则可以采取行动 例如,停止其工作)。最简单的操作就是撤销他们的 API 权限。
¥Requiring a key enables the API provider to hold users of the API accountable for their actions. When the developer has registered for a key, they are then known to the API provider, and action can be taken if they start to do anything malicious with the API (such as tracking people's location or trying to spam the API with loads of requests to stop it working, for example). The easiest action would be to just revoke their API privileges.
扩展 Mapquest 示例
¥Extending the Mapquest example
让我们向 Mapquest 示例添加更多功能,以展示如何使用 API 的其他一些功能。
¥Let's add some more functionality to the Mapquest example to show how to use some other features of the API.
- 要开始本节,请在新目录中为自己制作 Mapquest 启动文件 的副本。如果你已经 克隆示例存储库,则你已经拥有此文件的副本,你可以在 javascript/apis/third-party-apis/mapquest/start 目录中找到该文件。
- 接下来,你需要转到 Mapquest 开发者网站,创建一个账户,然后创建一个开发者密钥以用于你的示例。(在撰写本文时,它在网站上被称为 "消费者密钥",并且密钥创建过程还要求提供可选的 "回调地址"。你不需要在此处填写 URL:只需将其留空即可。)
- 打开你的起始文件,并将 API 密钥占位符替换为你的密钥。
更改映射类型
¥Changing the type of map
Mapquest API 可以显示多种不同类型的地图。为此,请找到以下行:
¥There are a number of different types of map that can be shown with the Mapquest API. To do this, find the following line:
layers: L.mapquest.tileLayer("map");
尝试将 'map' 更改为 'hybrid' 以显示混合风格的地图。也尝试一些其他值。tileLayer 参考页 显示了不同的可用选项,以及更多信息。
¥Try changing 'map' to 'hybrid' to show a hybrid-style map. Try some other values too. The tileLayer reference page shows the different available options, plus a lot more information.
添加不同的控件
¥Adding different controls
该地图有许多不同的可用控件;默认情况下,它只显示缩放控件。你可以使用 map.addControl() 方法扩展可用的控件;将其添加到你的代码中:
¥The map has a number of different controls available; by default it just shows a zoom control. You can expand the controls available using the map.addControl() method; add this to your code:
map.addControl(L.mapquest.control());
mapquest.control() method 只是创建了一个简单的全功能控制集,并且默认放置在右上角。你可以通过指定选项对象作为包含 position 属性的控件的参数来调整位置,该属性的值是指定控件位置的字符串。试试这个,例如:
¥The mapquest.control() method just creates a simple full-featured control set, and it is placed in the top-right-hand corner by default. You can adjust the position by specifying an options object as a parameter for the control containing a position property, the value of which is a string specifying a position for the control. Try this, for example:
map.addControl(L.mapquest.control({ position: "bottomright" }));
还有其他类型的控制可用,例如 mapquest.searchControl() 和 mapquest.satelliteControl(),有些非常复杂且功能强大。玩一玩,看看你能想出什么。
¥There are other types of control available, for example mapquest.searchControl() and mapquest.satelliteControl(), and some are quite complex and powerful. Have a play around and see what you can come up with.
添加自定义标记
¥Adding a custom marker
在地图上的某个点添加标记(图标)很简单 - 你只需使用 L.marker() 方法(这似乎记录在相关的 Leaflet.js 文档中)。将以下代码添加到你的示例中,再次位于 window.onload 内:
¥Adding a marker (icon) at a certain point on the map is easy — you just use the L.marker() method (which seems to be documented in the related Leaflet.js docs). Add the following code to your example, again inside window.onload:
L.marker([53.480759, -2.242631], {
  icon: L.mapquest.icons.marker({
    primaryColor: "#22407F",
    secondaryColor: "#3B5998",
    shadow: true,
    size: "md",
    symbol: "A",
  }),
})
  .bindPopup("This is Manchester!")
  .addTo(map);
正如你所看到的,最简单的情况是,它需要两个参数,一个包含显示标记的坐标的数组,以及一个包含 icon 属性的选项对象,该属性定义在该点显示的图标。
¥As you can see, this at its simplest takes two parameters, an array containing the coordinates at which to display the marker, and an options object containing an icon property that defines the icon to display at that point.
该图标是使用 mapquest.icons.marker() 方法定义的,你可以看到该方法包含标记的颜色和大小等信息。
¥The icon is defined using an mapquest.icons.marker() method, which as you can see contains information such as color and size of marker.
在第一个方法调用的末尾,我们链接了 .bindPopup('This is Manchester!'),它定义了单击标记时要显示的内容。
¥Onto the end of the first method call we chain .bindPopup('This is Manchester!'), which defines content to display when the marker is clicked.
最后,我们将 .addTo(map) 链接到链的末尾,以实际将标记添加到地图中。
¥Finally, we chain .addTo(map) to the end of the chain to actually add the marker to the map.
尝试一下文档中显示的其他选项,看看你能想出什么!Mapquest 提供了一些相当高级的功能,例如方向、搜索等。
¥Have a play with the other options shown in the documentation and see what you can come up with! Mapquest provides some pretty advanced functionality, such as directions, searching, etc.
注意:如果你在使示例正常运行时遇到困难,请根据我们的 成品版 检查你的代码。
¥Note: If you have trouble getting the example to work, check your code against our finished version.
RESTful API — 纽约时报
¥A RESTful API — NYTimes
现在让我们看另一个 API 示例 — 纽约时报 API。此 API 允许你检索《纽约时报》新闻故事信息并将其显示在你的网站上。这种类型的 API 称为 RESTful API - 我们不像 Mapquest 那样使用 JavaScript 库的功能来获取数据,而是通过向特定 URL 发出 HTTP 请求来获取数据,其中搜索词和其他属性等数据编码在 URL(通常作为 URL 参数)。这是你在使用 API 时会遇到的常见模式。
¥Now let's look at another API example — the New York Times API. This API allows you to retrieve New York Times news story information and display it on your site. This type of API is known as a RESTful API — instead of getting data using the features of a JavaScript library like we did with Mapquest, we get data by making HTTP requests to specific URLs, with data like search terms and other properties encoded in the URL (often as URL parameters). This is a common pattern you'll encounter with APIs.
下面我们将带你完成一个练习,向你展示如何使用 NYTimes API,该练习还提供了一组更通用的步骤,你可以将其用作使用新 API 的方法。
¥Below we'll take you through an exercise to show you how to use the NYTimes API, which also provides a more general set of steps to follow that you can use as an approach for working with new APIs.
查找文档
¥Find the documentation
当你想使用第三方 API 时,有必要查一下文档在哪里,这样你就可以了解该 API 有哪些功能、如何使用等。《纽约时报》API 文档位于 https://developer.nytimes.com。
¥When you want to use a third party API, it is essential to find out where the documentation is, so you can find out what features the API has, how you use them, etc. The New York Times API documentation is at https://developer.nytimes.com.
获取开发者密钥
¥Get a developer key
出于安全和责任的原因,大多数 API 要求你使用某种开发者密钥。要注册 NYTimes API 密钥,请按照 https://developer.nytimes.com/get-started 中的说明进行操作。
¥Most APIs require you to use some kind of developer key, for reasons of security and accountability. To sign up for an NYTimes API key, following the instructions at https://developer.nytimes.com/get-started.
- 让我们为文章搜索 API 请求一个密钥 - 创建一个新应用,选择它作为你要使用的 API(填写名称和描述,将 "文章搜索 API" 下的开关切换到打开位置,然后单击 "创造")。
- 从结果页面获取 API 密钥。
- 现在,要开始该示例,请复制 nytimes/start 目录中的所有文件。如果你已经 克隆示例存储库,则你已经拥有这些文件的副本,你可以在 javascript/apis/third-party-apis/nytimes/start 目录中找到该副本。最初,
script.js文件包含示例设置所需的许多变量;下面我们将填写所需的功能。
该应用最终将允许你输入搜索词以及可选的开始和结束日期,然后它将用于查询文章搜索 API 并显示搜索结果。
¥The app will end up allowing you to type in a search term and optional start and end dates, which it will then use to query the Article Search API and display the search results.

将 API 连接到你的应用
¥Connect the API to your app
首先,你需要在 API 和你的应用之间建立连接。对于此 API,每次你通过正确的 URL 向服务请求数据时,都需要包含 API 密钥作为 get 参数。
¥First, you'll need to make a connection between the API and your app. In the case of this API, you need to include the API key as a get parameter every time you request data from the service at the correct URL.
- 找到以下行:
将现有 API 密钥替换为你在上一节中获得的实际 API 密钥。js
const key = "INSERT-YOUR-API-KEY-HERE"; - 将以下行添加到 JavaScript 中“
// Event listeners to control the functionality”注释下方。当提交表单(按下按钮)时,这将运行一个名为submitSearch()的函数。jssearchForm.addEventListener("submit", submitSearch); - 现在在上一行下方添加
submitSearch()和fetchResults()函数定义:jsfunction submitSearch(e) { pageNumber = 0; fetchResults(e); } function fetchResults(e) { // Use preventDefault() to stop the form submitting e.preventDefault(); // Assemble the full URL let url = `${baseURL}?api-key=${key}&page=${pageNumber}&q=${searchTerm.value}&fq=document_type:("article")`; if (startDate.value !== "") { url = `${url}&begin_date=${startDate.value}`; } if (endDate.value !== "") { url = `${url}&end_date=${endDate.value}`; } }
submitSearch() 首先将页码设置回 0,然后调用 fetchResults()。首先在事件对象上调用 preventDefault(),以停止表单实际提交(这会破坏示例)。接下来,我们使用一些字符串操作来组装我们将向其发出请求的完整 URL。我们首先组装我们认为此演示必需的部件:
¥submitSearch() sets the page number back to 0 to begin with, then calls fetchResults(). This first calls preventDefault() on the event object, to stop the form actually submitting (which would break the example). Next, we use some string manipulation to assemble the full URL that we will make the request to. We start off by assembling the parts we deem as mandatory for this demo:
- 基本 URL(取自
baseURL变量)。 - API 密钥,必须在
api-keyURL 参数中指定(该值取自key变量)。 - 页码,必须在
pageURL 参数中指定(该值取自pageNumber变量)。 - 搜索词,必须在
qURL 参数中指定(该值取自searchTerm文本<input>的值)。 - 要返回结果的文档类型,通过
fqURL 参数传入的表达式中指定。在这种情况下,我们想要返回文章。
接下来,我们使用几个 if () 语句来检查 startDate 和 endDate 元素是否已填充值。如果存在,我们会将它们的值附加到分别在 begin_date 和 end_date URL 参数中指定的 URL。
¥Next, we use a couple of if () statements to check whether the startDate and endDate elements have had values filled in on them. If they do, we append their values to the URL, specified in begin_date and end_date URL parameters respectively.
因此,一个完整的 URL 最终会看起来像这样:
¥So, a complete URL would end up looking something like this:
https:/svc/search/v2/articlesearch.json?api-key=YOUR-API-KEY-HERE&page=0&q=cats&fq=document_type:("article")&begin_date=20170301&end_date=20170312
注意:你可以在 纽约时报开发者文档.conf 中找到有关可以包含哪些 URL 参数的更多详细信息。
¥Note: You can find more details of what URL parameters can be included at the NYTimes developer docs.
注意:该示例具有基本的表单数据验证 - 必须在提交表单之前填写搜索词字段(使用
required属性实现),并且日期字段指定了pattern属性,这意味着除非它们的值,否则它们不会提交 由 8 个数字 (pattern="[0-9]{8}") 组成。有关它们如何工作的更多详细信息,请参阅 表单数据验证。¥Note: The example has rudimentary form data validation — the search term field has to be filled in before the form can be submitted (achieved using the
requiredattribute), and the date fields havepatternattributes specified, which means they won't submit unless their values consist of 8 numbers (pattern="[0-9]{8}"). See Form data validation for more details on how these work.
从 API 请求数据
¥Requesting data from the API
现在我们已经构建了 URL,让我们向它发出请求。我们将使用 获取 API 来完成此操作。
¥Now we've constructed our URL, let's make a request to it. We'll do this using the Fetch API.
在 fetchResults() 函数内、右大括号上方添加以下代码块:
¥Add the following code block inside the fetchResults() function, just above the closing curly brace:
// Use fetch() to make the request to the API
fetch(url)
  .then((response) => response.json())
  .then((json) => displayResults(json))
  .catch((error) => console.error(`Error fetching data: ${error.message}`));
在这里,我们通过将 url 变量传递给 fetch() 来运行请求,使用 json() 函数将响应正文转换为 JSON,然后将生成的 JSON 传递给 displayResults() 函数,以便数据可以显示在我们的 UI 中。我们还捕获并记录可能引发的任何错误。
¥Here we run the request by passing our url variable to fetch(), convert the response body to JSON using the json() function, then pass the resulting JSON to the displayResults() function so the data can be displayed in our UI. We also catch and log any errors that might be thrown.
显示数据
¥Displaying the data
好的,让我们看看如何显示数据。在 fetchResults() 函数下方添加以下函数。
¥OK, let's look at how we'll display the data. Add the following function below your fetchResults() function.
function displayResults(json) {
  while (section.firstChild) {
    section.removeChild(section.firstChild);
  }

  const articles = json.response.docs;

  nav.style.display = articles.length === 10 ? "block" : "none";

  if (articles.length === 0) {
    const para = document.createElement("p");
    para.textContent = "No results returned.";
    section.appendChild(para);
  } else {
    for (const current of articles) {
      const article = document.createElement("article");
      const heading = document.createElement("h2");
      const link = document.createElement("a");
      const img = document.createElement("img");
      const para1 = document.createElement("p");
      const keywordPara = document.createElement("p");
      keywordPara.classList.add("keywords");

      console.log(current);

      link.href = current.web_url;
      link.textContent = current.headline.main;
      para1.textContent = current.snippet;
      keywordPara.textContent = "Keywords: ";
      for (const keyword of current.keywords) {
        const span = document.createElement("span");
        span.textContent = `${keyword.value} `;
        keywordPara.appendChild(span);
      }

      if (current.multimedia.length > 0) {
        img.src = `http://www.nytimes.com/${current.multimedia[0].url}`;
        img.alt = current.headline.main;
      }

      article.appendChild(heading);
      heading.appendChild(link);
      article.appendChild(img);
      article.appendChild(para1);
      article.appendChild(keywordPara);
      section.appendChild(article);
    }
  }
}
这里有很多代码;让我们逐步解释一下:
¥There's a lot of code here; let's explain it step by step:
while循环是一种常见模式,用于删除 DOM 元素(在本例中为<section>元素)的所有内容。我们不断检查<section>是否有第一个子级,如果有,我们删除第一个子级。当<section>不再有任何子节点时,循环结束。- 接下来,我们将
articles变量设置为等于json.response.docs— 这是包含表示搜索返回的文章的所有对象的数组。这样做纯粹是为了让下面的代码更简单一些。 - 第一个
if ()块检查是否返回 10 篇文章(API 一次最多返回 10 篇文章)。如果是这样,我们将显示包含前 10/后 10 分页按钮的<nav>。如果返回的文章少于 10 篇,它们将全部放在一页上,因此我们不需要显示分页按钮。我们将在下一节中连接分页功能。 - 下一个
if ()块检查是否没有文章返回。如果是这样,我们不会尝试显示任何内容 - 我们创建一个包含文本 "没有返回结果。" 的<p>并将其插入到<section>中。 - 如果返回一些文章,我们首先创建要用于显示每个新闻报道的所有元素,将正确的内容插入到每个元素中,然后将它们插入到 DOM 的适当位置。为了确定文章对象中的哪些属性包含要显示的正确数据,我们查阅了文章搜索 API 参考(参见 纽约时报 API)。大多数这些操作都相当明显,但有一些值得一提:
连接分页按钮
¥Wiring up the pagination buttons
为了使分页按钮正常工作,我们将增加(或减少)pageNumber 变量的值,然后使用页面 URL 参数中包含的新值重新运行获取请求。这是有效的,因为 NYTimes API 一次仅返回 10 个结果 — 如果有超过 10 个结果可用,如果 page URL 参数设置为 0(或根本不包含 — 0),它将返回前 10 个 (0-9) 是默认值),如果设置为 1,则为下一个 10 (10-19),依此类推。
¥To make the pagination buttons work, we will increment (or decrement) the value of the pageNumber variable, and then re-rerun the fetch request with the new value included in the page URL parameter. This works because the NYTimes API only returns 10 results at a time — if more than 10 results are available, it will return the first 10 (0-9) if the page URL parameter is set to 0 (or not included at all — 0 is the default value), the next 10 (10-19) if it is set to 1, and so on.
这使我们能够编写一个简单的分页函数。
¥This allows us to write a simplistic pagination function.
- 在现有的
addEventListener()调用下方,添加这两个新函数,这会导致单击相关按钮时调用nextPage()和previousPage()函数:jsnextBtn.addEventListener("click", nextPage); previousBtn.addEventListener("click", previousPage); -
在之前添加的内容下面,让我们定义两个函数 - 现在添加以下代码:
第一个函数递增js
function nextPage(e) { pageNumber++; fetchResults(e); } function previousPage(e) { if (pageNumber > 0) { pageNumber--; } else { return; } fetchResults(e); }pageNumber变量,然后再次运行fetchResults()函数以显示下一页的结果。 第二个函数的工作方式几乎完全相反,但我们还必须采取额外的步骤,在递减pageNumber之前检查pageNumber是否已经为零 - 如果获取请求使用负pageURL 参数运行,则可能会导致错误。如果pageNumber已经是 0,我们就return退出函数 - 如果我们已经在第一页,我们就不需要再次加载相同的结果。
注意:你可以找到我们的 GitHub 上完成的 NYTimes API 示例代码(也有 在这里查看它的实时运行)。
¥Note: You can find our finished NYTimes API example code on GitHub (also see it running live here).
YouTube 示例
¥YouTube example
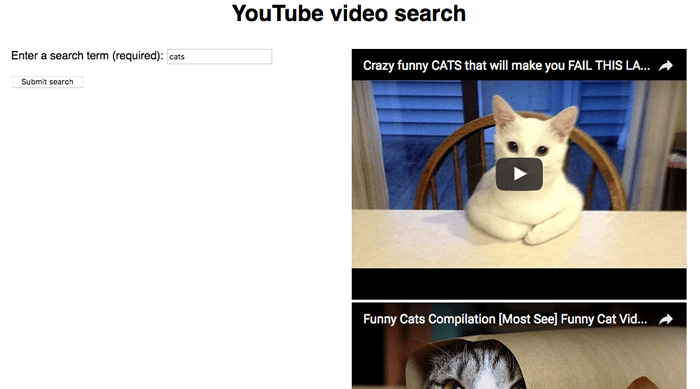
我们还构建了另一个示例供你学习和学习 - 请参阅我们的 YouTube 视频搜索示例。这使用了两个相关的 API:
¥We also built another example for you to study and learn from — see our YouTube video search example. This uses two related APIs:
- YouTube 数据 API 用于搜索 YouTube 视频并返回结果。
- YouTube IFrame 播放器 API 在 IFrame 视频播放器中显示返回的视频示例,以便你可以观看它们。
这个示例很有趣,因为它显示了两个相关的第三方 API 一起使用来构建应用。第一个是 RESTful API,而第二个的工作方式更像 Mapquest(具有特定于 API 的方法等)。但值得注意的是,这两个 API 都需要将 JavaScript 库应用到页面。RESTful API 具有可用于处理发出 HTTP 请求并返回结果的函数。
¥This example is interesting because it shows two related third-party APIs being used together to build an app. The first one is a RESTful API, while the second one works more like Mapquest (with API-specific methods, etc.). It is worth noting however that both of the APIs require a JavaScript library to be applied to the page. The RESTful API has functions available to handle making the HTTP requests and returning the results.
我们不会在本文中对这个示例进行太多介绍 - 源代码 在其中插入了详细的注释来解释它是如何工作的。
¥We are not going to say too much more about this example in the article — the source code has detailed comments inserted inside it to explain how it works.
要让它运行,你需要:
¥To get it running, you'll need to:
- 阅读 YouTube 数据 API 概述 文档。
- 确保你访问 启用的 API 页面,并在 API 列表中确保 YouTube 数据 API v3 的状态为“开启”。
- 从 谷歌云 获取 API 密钥。
- 在源代码中找到字符串
ENTER-API-KEY-HERE,并将其替换为你的 API 密钥。 - 通过 Web 服务器运行该示例。如果你直接在浏览器中运行(即通过
file://URL),它将无法工作。
概括
¥Summary
本文向你介绍了如何使用第三方 API 向你的网站添加功能。
¥This article has given you a useful introduction to using third-party APIs to add functionality to your websites.