样式列表
列表 的行为在很大程度上与任何其他文本类似,但你需要了解一些特定于列表的 CSS 属性,以及需要考虑的一些最佳实践。这篇文章解释了一切。
¥Lists behave like any other text for the most part, but there are some CSS properties specific to lists that you need to know about, as well as some best practices to consider. This article explains all.
| 先决条件: | HTML 基础知识(学习 HTML 简介)、CSS 基础知识(学习 CSS 简介)、 CSS 文本和字体基础知识。 |
|---|---|
| 目标: | 熟悉与样式列表相关的最佳实践和属性。 |
一个简单的列表示例
¥A simple list example
首先,让我们看一个简单的列表示例。在整篇文章中,我们将研究无序列表、有序列表和描述列表 - 所有列表都具有相似的样式功能,以及一些各自特有的样式功能。无样式的示例是 可以在 GitHub 上找到(也请查看 源代码。)
¥To begin with, let's look at a simple list example. Throughout this article, we'll look at unordered, ordered, and description lists — all have styling features that are similar, as well as some that are particular to themselves. The unstyled example is available on GitHub (check out the source code too.)
我们的列表示例的 HTML 如下所示:
¥The HTML for our list example looks like so:
<h2>Shopping (unordered) list</h2>

<p>
  Paragraph for reference, paragraph for reference, paragraph for reference,
  paragraph for reference, paragraph for reference, paragraph for reference.
</p>

<ul>
  <li>Hummus</li>
  <li>Pita</li>
  <li>Green salad</li>
  <li>Halloumi</li>
</ul>

<h2>Recipe (ordered) list</h2>

<p>
  Paragraph for reference, paragraph for reference, paragraph for reference,
  paragraph for reference, paragraph for reference, paragraph for reference.
</p>

<ol>
  <li>Toast pita, leave to cool, then slice down the edge.</li>
  <li>
    Fry the halloumi in a shallow, non-stick pan, until browned on both sides.
  </li>
  <li>Wash and chop the salad.</li>
  <li>Fill pita with salad, hummus, and fried halloumi.</li>
</ol>

<h2>Ingredient description list</h2>

<p>
  Paragraph for reference, paragraph for reference, paragraph for reference,
  paragraph for reference, paragraph for reference, paragraph for reference.
</p>

<dl>
  <dt>Hummus</dt>
  <dd>
    A thick dip/sauce generally made from chick peas blended with tahini, lemon
    juice, salt, garlic, and other ingredients.
  </dd>
  <dt>Pita</dt>
  <dd>A soft, slightly leavened flatbread.</dd>
  <dt>Halloumi</dt>
  <dd>
    A semi-hard, unripened, brined cheese with a higher-than-usual melting
    point, usually made from goat/sheep milk.
  </dd>
  <dt>Green salad</dt>
  <dd>That green healthy stuff that many of us just use to garnish kebabs.</dd>
</dl>
如果你现在转到实时示例并使用 浏览器开发者工具 研究列表元素,你会注意到一些样式默认值:
¥If you go to the live example now and investigate the list elements using browser developer tools, you'll notice a couple of styling defaults:
<ul>和<ol>元素具有16px(1em) 的顶部和底部margin以及40px(2.5em) 的padding-left。如果ul和ol元素的方向属性dir设置为从右到左 (rtl),则padding-right生效,其默认值为40px(2.5em) 。- 列表项(
<li>元素)没有设置默认间距。 <dl>元素的顶部和底部margin为16px(1em),但没有设置填充。<dd>元素具有margin-left或40px(2.5em)。- 我们包含的供参考的
<p>元素具有16px(1em) 的顶部和底部margin— 与不同列表类型相同。
处理列表间距
¥Handling list spacing
在设计列表样式时,你需要调整它们的样式,使它们保持与周围元素(例如段落和图片;有时称为垂直节奏)相同的垂直间距,以及彼此相同的水平间距(你可以在 GitHub 上查看 完成样式示例) ,还有 找到源代码)。
¥When styling lists, you need to adjust their styles so they keep the same vertical spacing as their surrounding elements (such as paragraphs and images; sometimes called vertical rhythm), and the same horizontal spacing as each other (you can see the finished styled example on GitHub, and find the source code too).
用于文本样式和间距的 CSS 如下:
¥The CSS used for the text styling and spacing is as follows:
/* General styles */

html {
  font-family: Helvetica, Arial, sans-serif;
  font-size: 10px;
}

h2 {
  font-size: 2rem;
}

ul,
ol,
dl,
p {
  font-size: 1.5rem;
}

li,
p {
  line-height: 1.5;
}

/* Description list styles */

dd,
dt {
  line-height: 1.5;
}

dt {
  font-weight: bold;
}
- 第一条规则设置站点范围字体和 10 像素的基线字体大小。这些被页面上的所有内容继承。
- 规则 2 和 3 设置标题、不同列表类型(列表元素的子元素继承这些)和段落的相对字体大小。这意味着每个段落和列表将具有相同的字体大小和顶部和底部间距,有助于保持垂直节奏一致。
- 规则 4 在段落和列表项上设置相同的
line-height— 因此段落和每个单独的列表项将具有相同的行间距。这也将有助于保持垂直节奏一致。 - 规则 5 和 6 适用于描述列表。我们在描述列表术语和描述上设置了与段落和列表项相同的
line-height。再说一遍,一致性很好!我们还使描述术语具有粗体,这样它们在视觉上更容易突出。
列表特定样式
¥List-specific styles
现在我们已经了解了列表的一般间距技术,让我们探讨一些特定于列表的属性。你应该首先了解三个属性,这些属性可以在 <ul> 或 <ol> 元素上设置:
¥Now that we've looked at general spacing techniques for lists, let's explore some list-specific properties. There are three properties you should know about to start with, which can be set on <ul> or <ol> elements:
list-style-type:设置用于列表的项目符号类型,例如,无序列表的方形或圆形项目符号,或有序列表的数字、字母或罗马数字。list-style-position:设置每个项目开头的项目符号是出现在列表内部还是外部。list-style-image:允许你为项目符号使用自定义图片,而不是简单的正方形或圆形。
项目符号样式
¥Bullet styles
如上所述,list-style-type 属性允许你设置项目符号点使用的项目符号类型。在我们的示例中,我们将有序列表设置为使用大写罗马数字:
¥As mentioned above, the list-style-type property allows you to set what type of bullet to use for the bullet points. In our example, we've set the ordered list to use uppercase roman numerals with:
ol {
  list-style-type: upper-roman;
}
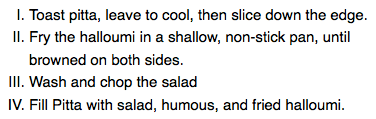
这给了我们以下的外观:
¥This gives us the following look:
你可以通过查看 list-style-type 参考页面找到更多选项。
¥You can find a lot more options by checking out the list-style-type reference page.
子弹位置
¥Bullet position
list-style-position 属性设置项目符号是出现在列表项内部,还是出现在每个项开始之前的外部。默认值为 outside,这会导致项目符号位于列表项之外,如上所示。
¥The list-style-position property sets whether the bullets appear inside the list items, or outside them before the start of each item. The default value is outside, which causes the bullets to sit outside the list items, as seen above.
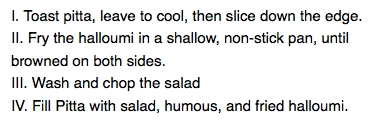
如果将该值设置为 inside,项目符号将位于行内:
¥If you set the value to inside, the bullets will sit inside the lines:
ol {
  list-style-type: upper-roman;
  list-style-position: inside;
}
使用自定义项目符号图片
¥Using a custom bullet image
list-style-image 属性允许你为项目符号使用自定义图片。语法非常简单:
¥The list-style-image property allows you to use a custom image for your bullet. The syntax is pretty simple:
ul {
  list-style-image: url(star.svg);
}
不过这个属性在控制子弹的位置、大小等方面有点限制。你最好使用你在 背景和边框 文章中学到的 background 系列属性。现在,这里有一个品尝者!
¥However, this property is a bit limited in terms of controlling the position, size, etc. of the bullets. You are better off using the background family of properties, which you've learned in the Backgrounds and borders article. For now, here's a taster!
在我们完成的示例中,我们将无序列表的样式设置为如下(在你上面已经看到的之上):
¥In our finished example, we have styled the unordered list like so (on top of what you've already seen above):
ul {
  padding-left: 2rem;
  list-style-type: none;
}

ul li {
  padding-left: 2rem;
  background-image: url(star.svg);
  background-position: 0 0;
  background-size: 1.6rem 1.6rem;
  background-repeat: no-repeat;
}
在这里我们做了以下工作:
¥Here we've done the following:
- 将
<ul>的padding-left从默认的40px设置为20px,然后在列表项上设置相同的金额。这样,总体而言,列表项仍然与有序列表项和描述列表描述对齐,但列表项有一些填充,以便背景图片位于内部。如果我们不这样做,背景图片将与列表项文本重叠,这看起来会很混乱。 - 将
list-style-type设置为none,以便默认不显示项目符号。我们将使用background属性来处理子弹。 - 在每个无序列表项上插入了一个项目符号。相关属性如下:
background-image:这引用了要用作项目符号的图片文件的路径。background-position:这定义了图片将出现在所选元素背景中的位置 - 在本例中我们说的是0 0,这意味着项目符号将出现在每个列表项的左上角。background-size:这设置了背景图片的大小。理想情况下,我们希望项目符号与列表项的大小相同(或者稍小或稍大)。我们使用的尺寸为1.6rem(16px),它非常适合我们允许项目符号位于内部的20px填充 — 16 像素加上项目符号和列表项文本之间的 4 像素空间效果很好。background-repeat:默认情况下,背景图片会重复,直到填满可用的背景空间。我们只想在每种情况下插入图片的一个副本,因此我们将其设置为值no-repeat。
这给了我们以下结果:
¥This gives us the following result:

列表式简写
¥list-style shorthand
上面提到的三个属性都可以使用一个简写属性 list-style 来设置。例如,以下 CSS:
¥The three properties mentioned above can all be set using a single shorthand property, list-style. For example, the following CSS:
ul {
  list-style-type: square;
  list-style-image: url(example.png);
  list-style-position: inside;
}
可以用这个代替:
¥Could be replaced by this:
ul {
  list-style: square url(example.png) inside;
}
这些值可以按任意顺序列出,并且你可以使用一个、两个或全部三个(未包含的属性使用的默认值为 disc、none 和 outside)。如果同时指定了 type 和 image,则当由于某种原因无法加载图片时,该类型将用作后备类型。
¥The values can be listed in any order, and you can use one, two, or all three (the default values used for the properties that are not included are disc, none, and outside). If both a type and an image are specified, the type is used as a fallback if the image can't be loaded for some reason.
控制列表计数
¥Controlling list counting
有时你可能希望对有序列表进行不同的计数 - 例如,从 1 以外的数字开始,或者向后计数,或者以大于 1 的步长进行计数。HTML 和 CSS 有一些工具可以在这方面为你提供帮助。
¥Sometimes you might want to count differently on an ordered list — e.g., starting from a number other than 1, or counting backwards, or counting in steps of more than 1. HTML and CSS have some tools to help you here.
start
start 属性允许你从 1 以外的数字开始计数。下面的例子:
¥The start attribute allows you to start the list counting from a number other than 1. The following example:
<ol start="4">
  <li>Toast pita, leave to cool, then slice down the edge.</li>
  <li>
    Fry the halloumi in a shallow, non-stick pan, until browned on both sides.
  </li>
  <li>Wash and chop the salad.</li>
  <li>Fill pita with salad, hummus, and fried halloumi.</li>
</ol>
给你这个输出:
¥Gives you this output:
reversed
reversed 属性将开始倒计时而不是向上倒计时。下面的例子:
¥The reversed attribute will start the list counting down instead of up. The following example:
<ol start="4" reversed>
  <li>Toast pita, leave to cool, then slice down the edge.</li>
  <li>
    Fry the halloumi in a shallow, non-stick pan, until browned on both sides.
  </li>
  <li>Wash and chop the salad.</li>
  <li>Fill pita with salad, hummus, and fried halloumi.</li>
</ol>
给你这个输出:
¥Gives you this output:
注意:如果反向列表中的列表项多于
start属性的值,则计数将继续为零,然后变为负值。¥Note: If there are more list items in a reversed list than the value of the
startattribute, the count will continue to zero and then into negative values.
value
value 属性允许你将列表项设置为特定数值。下面的例子:
¥The value attribute allows you to set your list items to specific numerical values. The following example:
<ol>
  <li value="2">Toast pita, leave to cool, then slice down the edge.</li>
  <li value="4">
    Fry the halloumi in a shallow, non-stick pan, until browned on both sides.
  </li>
  <li value="6">Wash and chop the salad.</li>
  <li value="8">Fill pita with salad, hummus, and fried halloumi.</li>
</ol>
给你这个输出:
¥Gives you this output:
注意:即使你使用非数字
list-style-type,你仍然需要在value属性中使用等效的数值。¥Note: Even if you are using a non-number
list-style-type, you still need to use the equivalent numerical values in thevalueattribute.
主动学习:设置嵌套列表的样式
¥Active learning: Styling a nested list
在这个主动学习课程中,我们希望你掌握上面学到的知识,并尝试设计嵌套列表的样式。我们已为你提供了 HTML,我们希望你:
¥In this active learning session, we want you to take what you've learned above and have a go at styling a nested list. We've provided you with the HTML, and we want you to:
- 给无序列表添加方形项目符号。
- 将无序列表项和有序列表项的行高设置为其字体大小的 1.5 倍。
- 为有序列表提供较低的字母项目符号。
- 你可以随意使用列表示例,尝试项目符号类型、间距或你能找到的任何其他内容。
如果你犯了错误,你可以随时使用“重置”按钮进行重置。如果你确实遇到困难,请按“显示解决方案”按钮查看潜在的答案。
¥If you make a mistake, you can always reset it using the Reset button. If you get really stuck, press the Show solution button to see a potential answer.
<div
  class="body-wrapper"
  style="font-family: 'Open Sans Light',Helvetica,Arial,sans-serif;">
  <h2>HTML Input</h2>
  <textarea
    id="code"
    class="html-input"
    style="width: 90%;height: 10em;padding: 10px;border: 1px solid #0095dd;">
<ul>
  <li>First, light the candle.</li>
  <li>Next, open the box.</li>
  <li>Finally, place the three magic items in the box, in this exact order, to complete the spell:
    <ol>
      <li>The book of spells</li>
      <li>The shiny rod</li>
      <li>The goblin statue</li>
    </ol>
  </li>
</ul>
  </textarea>

  <h2>CSS Input</h2>
  <textarea
    id="code"
    class="css-input"
    style="width: 90%;height: 10em;padding: 10px;border: 1px solid #0095dd;"></textarea>

  <h2>Output</h2>
  <div
    class="output"
    style="width: 90%;height: 12em;padding: 10px;border: 1px solid #0095dd;overflow: auto;"></div>
  <div class="controls">
    <input
      id="reset"
      type="button"
      value="Reset"
      style="margin: 10px 10px 0 0;" />
    <input
      id="solution"
      type="button"
      value="Show solution"
      style="margin: 10px 0 0 10px;" />
  </div>
</div>
const htmlInput = document.querySelector(".html-input");
const cssInput = document.querySelector(".css-input");
const reset = document.getElementById("reset");
const htmlCode = htmlInput.value;
const cssCode = cssInput.value;
const output = document.querySelector(".output");
const solution = document.getElementById("solution");

const styleElem = document.createElement("style");
const headElem = document.querySelector("head");
headElem.appendChild(styleElem);

function drawOutput() {
  output.innerHTML = htmlInput.value;
  styleElem.textContent = cssInput.value;
}

reset.addEventListener("click", () => {
  htmlInput.value = htmlCode;
  cssInput.value = cssCode;
  drawOutput();
});

solution.addEventListener("click", () => {
  htmlInput.value = htmlCode;
  cssInput.value = `ul {
  list-style-type: square;
}

ul li,
ol li {
  line-height: 1.5;
}

ol {
  list-style-type: lower-alpha;
}`;
  drawOutput();
});

htmlInput.addEventListener("input", drawOutput);
cssInput.addEventListener("input", drawOutput);
window.addEventListener("load", drawOutput);
概括
¥Summary
一旦你了解了一些相关的基本原则和特定属性,列表就相对容易掌握样式的窍门。在下一篇文章中,我们将继续讨论 链接样式技术。
¥Lists are relatively easy to get the hang of styling once you know a few associated basic principles and specific properties. In the next article, we'll move on to link styling techniques.
也可以看看
¥See also
CSS 计数器提供了用于自定义列表计数和样式的高级工具,但它们相当复杂。如果你想扩展自己,我们建议你研究一下这些内容。看:
¥CSS counters provide advanced tools for customizing list counting and styling, but they are quite complex. We recommend looking into these if you want to stretch yourself. See: