CSS 基础知识
CSS(层叠样式表)是用于设置 Web 内容样式的代码。CSS 基础知识逐步介绍了入门所需的内容。我们将回答以下问题:如何将文字设为红色?如何使内容显示在(网页)布局中的特定位置?如何使用背景图片和颜色装饰我的网页?
¥CSS (Cascading Style Sheets) is the code that styles web content. CSS basics walks through what you need to get started. We'll answer questions like: How do I make text red? How do I make content display at a certain location in the (webpage) layout? How do I decorate my webpage with background images and colors?
什么是 CSS?
¥What is CSS?
与 HTML 一样,CSS 不是一种编程语言。它也不是一种标记语言。CSS 是一种样式表语言。CSS 是用来选择性地设计 HTML 元素的样式的。例如,此 CSS 选择段落文本,将颜色设置为红色:
¥Like HTML, CSS is not a programming language. It's not a markup language either. CSS is a style sheet language. CSS is what you use to selectively style HTML elements. For example, this CSS selects paragraph text, setting the color to red:
p {
  color: red;
}
我们来尝试一下吧!使用文本编辑器,将三行 CSS(上面)粘贴到一个新文件中。将文件保存为 style.css,并保存在名为 styles 的目录中。
¥Let's try it out! Using a text editor, paste the three lines of CSS (above) into a new file. Save the file as style.css in a directory named styles.
为了使代码正常工作,我们仍然需要将此 CSS(上面)应用到你的 HTML 文档。否则,样式不会改变 HTML 的外观。(如果你还没有关注我们的项目,请在此暂停阅读 处理文件 和 HTML 基础知识。)
¥To make the code work, we still need to apply this CSS (above) to your HTML document. Otherwise, the styling won't change the appearance of the HTML. (If you haven't been following our project, pause here to read Dealing with files and HTML basics.)
- 打开你的
index.html文件。将以下行粘贴到头部(<head>和</head>标签之间):html<link href="styles/style.css" rel="stylesheet" /> - 保存
index.html并将其加载到浏览器中。你应该看到这样的东西:
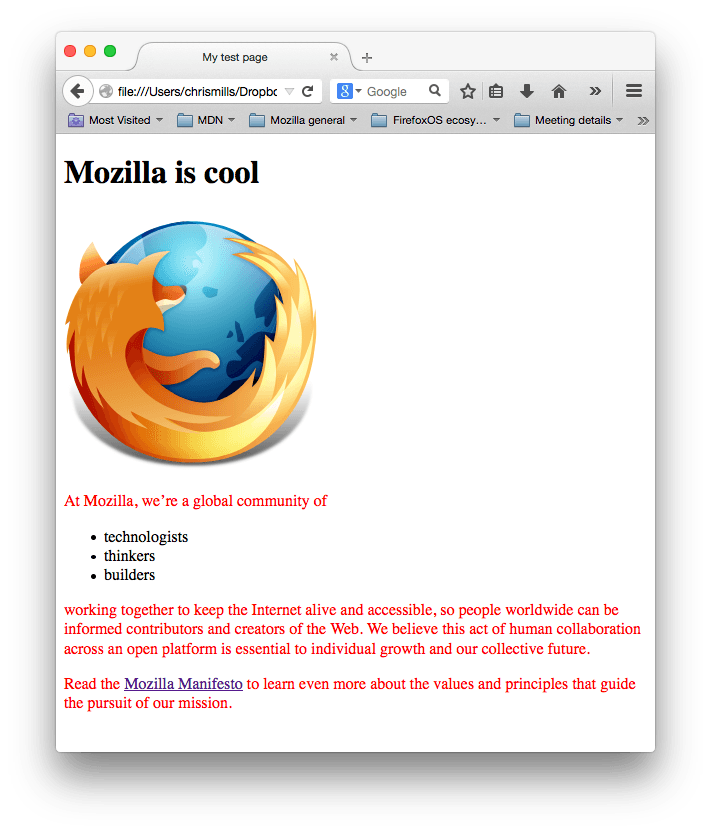
如果你的段落文本是红色的,那么恭喜你!你的 CSS 正在运行。
¥If your paragraph text is red, congratulations! Your CSS is working.
CSS 规则集剖析
¥Anatomy of a CSS ruleset
让我们剖析红色段落文本的 CSS 代码,以了解它是如何工作的:
¥Let's dissect the CSS code for red paragraph text to understand how it works:
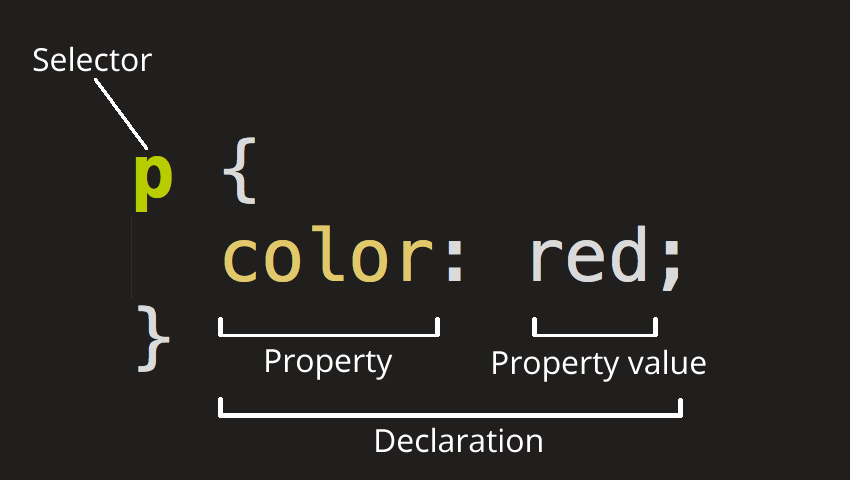
整个结构称为规则集。(术语“规则集”通常被称为“规则”。)注意各个部分的名称:
¥The whole structure is called a ruleset. (The term ruleset is often referred to as just rule.) Note the names of the individual parts:
- 选择器
-
这是规则集开头的 HTML 元素名称。它定义要设置样式的元素(在本例中为
<p>元素)。要设置不同元素的样式,请更改选择器。 - 声明
-
这是像
color: red;一样的单一规则。它指定你想要设置样式的元素属性。 - 属性
-
这些是你可以设置 HTML 元素样式的方法。(在此示例中,
color是<p>元素的属性。)在 CSS 中,你可以选择要在规则中影响的属性。 - 适当的价值
-
在属性的右侧(冒号后面)是属性值。这会从给定属性的多种可能外观中选择一种。(例如,除了
red之外,还有很多color值。)
请注意语法的其他重要部分:
¥Note the other important parts of the syntax:
- 除了选择器之外,每个规则集都必须用大括号括起来。(
{}) - 在每个声明中,必须使用冒号 (
:) 将属性与其一个或多个值分隔开。 - 在每个规则集中,必须使用分号 (
;) 将每个声明与下一个声明分隔开。
要修改一个规则集中的多个属性值,请用分号分隔它们,如下所示:
¥To modify multiple property values in one ruleset, write them separated by semicolons, like this:
p {
  color: red;
  width: 500px;
  border: 1px solid black;
}
选择多个元素
不同类型的选择器
¥Different types of selectors
有许多不同类型的选择器。上面的示例使用元素选择器,它选择给定类型的所有元素。但我们也可以做出更具体的选择。以下是一些更常见的选择器类型:
¥There are many different types of selectors. The examples above use element selectors, which select all elements of a given type. But we can make more specific selections as well. Here are some of the more common types of selectors:
| 选择器名称 | 它选择什么 | 示例 |
|---|---|---|
| 元素选择器(有时称为标签或类型选择器) | 指定类型的所有 HTML 元素。 | p选择 <p> |
| ID 选择器 | 页面上具有指定 ID 的元素。在给定的 HTML 页面上,每个 id 值应该是唯一的。 |
#my-id选择 <p id="my-id"> 或
<a id="my-id">
|
| 类选择器 | 页面上具有指定类的元素。同一类的多个实例可以出现在一个页面上。 |
.my-class选择 <p class="my-class"> 和
<a class="my-class">
|
| 属性选择器 | 页面上具有指定属性的元素。 |
img[src]选择 <img src="myimage.png"> 但不选择
<img>
|
| 伪类选择器 | 指定的元素,但仅当处于指定状态时。(例如,当光标悬停在链接上时。) | a:hover选择 <a>,但仅当鼠标指针悬停在链接上时才选择。 |
还有更多选择器有待发现。要了解更多信息,请参阅 MDN 选择器指南。
¥There are many more selectors to discover. To learn more, see the MDN Selectors guide.
字体和文本
¥Fonts and text
现在我们已经探索了一些 CSS 基础知识,让我们通过向 style.css 文件添加更多规则和信息来改进示例的外观。
¥Now that we've explored some CSS fundamentals, let's improve the appearance of the example by adding more rules and information to the style.css file.
- 首先,找到你之前从 你的网站会是什么样子? 保存的 Google 字体的输出。将
<link>元素添加到index.html头部内的某个位置(<head>和</head>标签之间的任何位置)。它看起来像这样:此代码将你的页面链接到一个样式表,该样式表将 Open Sans 字体系列加载到你的网页上。html<link href="https://fonts.googleapis.com/css?family=Open+Sans" rel="stylesheet" /> - 接下来,删除
style.css文件中的现有规则。这是一个很好的测试,但我们不要继续使用大量的红色文本。 - 添加以下行(如下所示),将
font-family分配替换为 你的网站会是什么样子? 中的font-family选择。属性font-family指的是你要用于文本的字体。该规则定义了整个页面的全局基本字体和字体大小。由于<html>是整个页面的父元素,因此其内部的所有元素都继承相同的font-size和font-family。csshtml { font-size: 10px; /* px means "pixels": the base font size is now 10 pixels high */ font-family: "Open Sans", sans-serif; /* this should be the rest of the output you got from Google Fonts */ }注意:CSS 中
/*和*/之间的任何内容都是 CSS 注释。浏览器在呈现代码时会忽略注释。CSS 注释是你编写有关代码或逻辑的有用注释的一种方式。¥Note: Anything in CSS between
/*and*/is a CSS comment. The browser ignores comments as it renders the code. CSS comments are a way for you to write helpful notes about your code or logic. - 现在让我们为 HTML 正文中包含文本的元素(<h1>、
<li>和<p>)设置字体大小。我们还将标题居中。最后,让我们使用行高和字母间距的设置来扩展第二个规则集(如下),以使正文内容更具可读性。cssh1 { font-size: 60px; text-align: center; } p, li { font-size: 16px; line-height: 2; letter-spacing: 1px; }
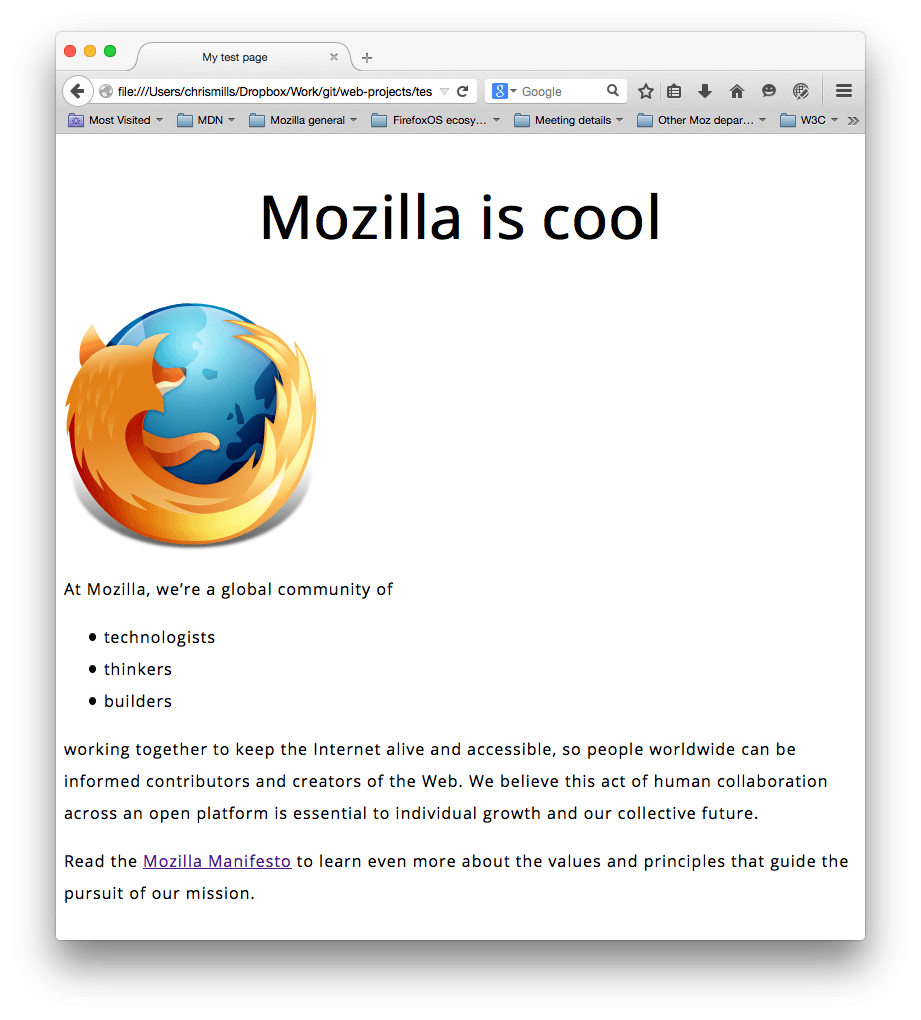
根据需要调整 px 值。你正在进行的工作应该类似于以下内容:
¥Adjust the px values as you like. Your work-in-progress should look similar to this:
CSS:关于盒子的一切
¥CSS: all about boxes
编写 CSS 时你会注意到以下几点:其中很多都是关于盒子的。这包括设置大小、颜色和位置。页面上的大多数 HTML 元素都可以被视为位于其他框之上的框。
¥Something you'll notice about writing CSS: a lot of it is about boxes. This includes setting size, color, and position. Most HTML elements on your page can be thought of as boxes sitting on top of other boxes.
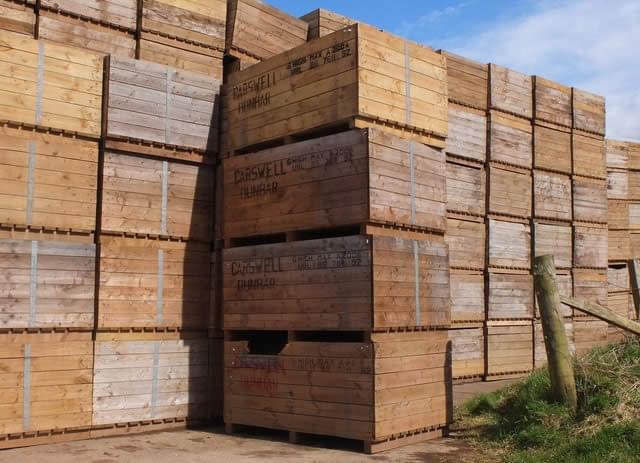
照片来自 https://www.geograph.org.uk/photo/3418115 版权所有 © 吉姆·巴顿 cc-by-sa/2.0
¥Photo from https://www.geograph.org.uk/photo/3418115 Copyright © Jim Barton cc-by-sa/2.0
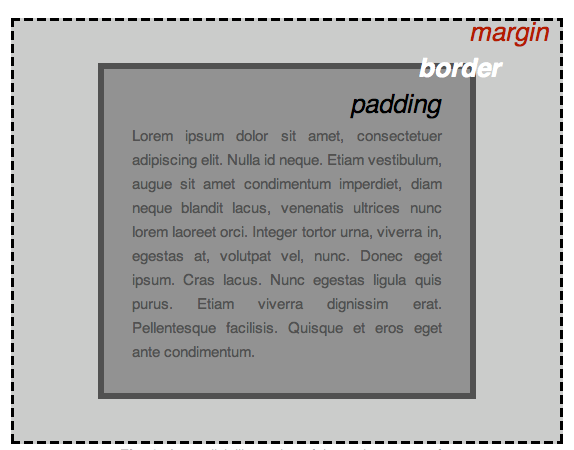
CSS 布局主要基于盒子模型。占用页面空间的每个框都具有以下属性:
¥CSS layout is mostly based on the box model. Each box taking up space on your page has properties like:
padding,内容周围的空间。在下面的示例中,它是段落文本周围的空间。border,填充外面的实线。margin,边界外侧周围的空间。
在本节中我们还使用:
¥In this section we also use:
width(元素的)。background-color,元素内容和填充背后的颜色。color,元素内容(通常是文本)的颜色。text-shadow在元素内的文本上设置阴影。display设置元素的显示模式。(继续阅读以了解更多信息)
要继续,让我们添加更多 CSS。继续在 style.css 的底部添加这些新规则。尝试改变值,看看会发生什么。
¥To continue, let's add more CSS. Keep adding these new rules at the bottom of style.css. Experiment with changing values to see what happens.
更改页面颜色
¥Changing the page color
html {
  background-color: #00539f;
}
该规则设置整个页面的背景颜色。将颜色代码更改为 你在我的网站是什么样子?中选择的颜色。
¥This rule sets a background color for the entire page. Change the color code to the color you chose in What will my website look like?.
塑造主体样式
¥Styling the body
body {
  width: 600px;
  margin: 0 auto;
  background-color: #ff9500;
  padding: 0 20px 20px 20px;
  border: 5px solid black;
}
<body> 元素有多个声明。让我们逐行查看这些内容:
¥There are several declarations for the <body> element. Let's go through these line-by-line:
width: 600px;这迫使主体始终为 600 像素宽。margin: 0 auto;当你在属性上设置两个值(如margin或padding)时,第一个值会影响元素的顶部和底部(在本例中将其设置为0);第二个值影响左侧和右侧。(这里,auto是一个特殊值,它将可用的水平空间平均分配到左右)。你还可以使用一个、两个、三个或四个值,如 保证金语法 中所述。background-color: #FF9500;这设置了元素的背景颜色。该项目使用红橙色作为主体背景颜色,而不是<html>元素的深蓝色。(随意尝试。)padding: 0 20px 20px 20px;这设置了四个填充值。目标是在内容周围留出一些空间。在此示例中,主体顶部没有内边距,右侧、底部和左侧各有 20 个像素。这些值按上、右、下、左的顺序设置。与margin一样,你可以使用一个、两个、三个或四个值,如 填充语法 中所述。border: 5px solid black;这设置了边框的宽度、样式和颜色的值。在本例中,它是一个五像素宽的实心黑色边框,位于主体的所有侧面。
主页标题的定位和样式
¥Positioning and styling the main page title
h1 {
  margin: 0;
  padding: 20px 0;
  color: #00539f;
  text-shadow: 3px 3px 1px black;
}
你可能已经注意到主体顶部有一个可怕的间隙。发生这种情况是因为浏览器将默认样式应用于 h1 元素(以及其他元素)。这似乎是一个坏主意,但其目的是为无样式页面提供基本的可读性。为了消除差距,我们使用设置 margin: 0; 覆盖浏览器的默认样式。
¥You may have noticed there's a horrible gap at the top of the body. That happens because browsers apply default styling to the h1 element (among others). That might seem like a bad idea, but the intent is to provide basic readability for unstyled pages. To eliminate the gap, we overwrite the browser's default styling with the setting margin: 0;.
接下来,我们将标题的顶部和底部内边距设置为 20 像素。
¥Next, we set the heading's top and bottom padding to 20 pixels.
接下来,我们将标题文本设置为与 HTML 背景颜色相同的颜色。
¥Following that, we set the heading text to be the same color as the HTML background color.
最后,text-shadow 对元素的文本内容应用阴影。它的四个值是:
¥Finally, text-shadow applies a shadow to the text content of the element. Its four values are:
- 第一个像素值设置阴影相对于文本的水平偏移:它移动了多远。
- 第二个像素值设置阴影相对于文本的垂直偏移:它向下移动多远。
- 第三个像素值设置阴影的模糊半径。值越大,阴影看起来越模糊。
- 第四个值设置阴影的基色。
尝试尝试不同的值,看看它如何改变外观。
¥Try experimenting with different values to see how it changes the appearance.
使图片居中
¥Centering the image
img {
  display: block;
  margin: 0 auto;
}
接下来,我们将图片居中以使其看起来更好。我们可以再次使用 margin: 0 auto 技巧,就像我们对主体所做的那样。但也存在一些差异,需要额外的设置才能使 CSS 正常工作。
¥Next, we center the image to make it look better. We could use the margin: 0 auto trick again as we did for the body. But there are differences that require an additional setting to make the CSS work.
<body> 是一个块元素,这意味着它占用页面上的空间。页面上的其他元素将遵守应用于块元素的边距。相反,图片是内联元素,为了使自动边距技巧在该图片上发挥作用,我们必须使用 display: block; 为其提供块级行为。
¥The <body> is a block element, meaning it takes up space on the page. The margin applied to a block element will be respected by other elements on the page. In contrast, images are inline elements, for the auto margin trick to work on this image, we must give it block-level behavior using display: block;.
注意:上述说明假设你使用的图片小于正文上设置的宽度。(600 像素)如果你的图片较大,它会溢出正文,溢出到页面的其余部分。要解决此问题,你可以:1)
¥Note: The instructions above assume that you're using an image smaller than the width set on the body. (600 pixels) If your image is larger, it will overflow the body, spilling into the rest of the page. To fix this, you can either: 1) reduce the image width using a graphics editor, or 2) use CSS to size the image by setting the
widthproperty on the<img>element with a smaller value.
注意:如果你不完全理解
display: block;或块元素和内联元素之间的差异,请不要太担心。当你继续学习 CSS 时,它会更有意义。你可以在 MDN 的 显示参考页 上找到有关不同显示值的更多信息。¥Note: Don't be too concerned if you don't completely understand
display: block;or the differences between a block element and an inline element. It will make more sense as you continue your study of CSS. You can find more information about different display values on MDN's display reference page.
结论
¥Conclusion
如果你按照本文中的所有说明进行操作,你应该会看到一个与此类似的页面:
¥If you followed all the instructions in this article, you should have a page that looks similar to this one:
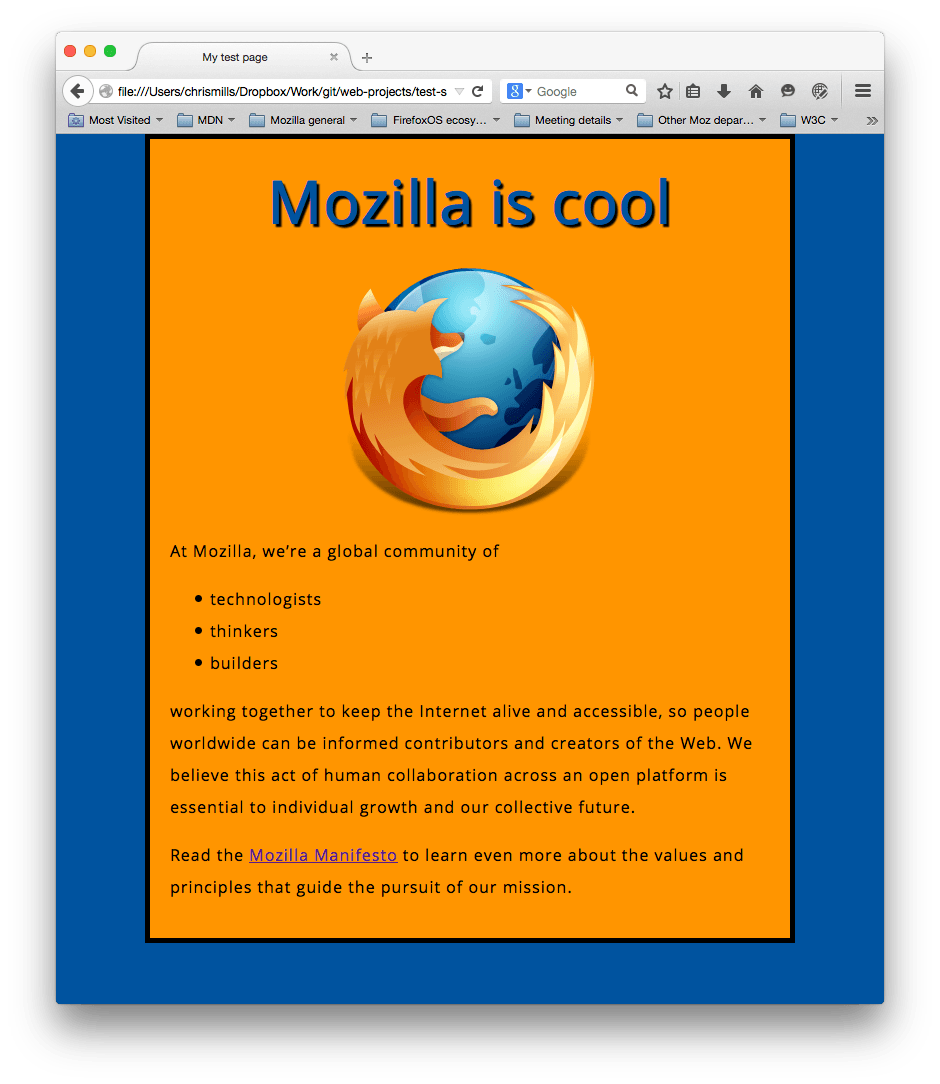
(你可以 在这里查看我们的版本。)如果你遇到困难,你可以随时将你的工作与我们的 GitHub 上完成的示例代码 进行比较。
¥(You can view our version here.) If you get stuck, you can always compare your work with our finished example code on GitHub.
在本练习中,我们仅仅触及了 CSS 的皮毛。要进一步了解,请参阅 学习使用 CSS 设置 HTML 样式。
¥In this exercise, we have just scratched the surface of CSS. To go further, see Learning to style HTML using CSS.