客户端存储
现代网络浏览器支持网站通过多种方式在用户计算机上存储数据(在用户许可的情况下),然后在必要时检索数据。这使你可以保留数据以进行长期存储、保存站点或文档以供离线使用、保留站点的用户特定设置等等。本文解释了它们如何工作的基础知识。
¥Modern web browsers support a number of ways for websites to store data on the user's computer — with the user's permission — then retrieve it when necessary. This lets you persist data for long-term storage, save sites or documents for offline use, retain user-specific settings for your site, and more. This article explains the very basics of how these work.
| 先决条件: | JavaScript 基础知识(参见 第一步、 架构模块、 JavaScript 对象)、 客户端 API 基础知识 |
|---|---|
| 目标: | 了解如何使用客户端存储 API 来存储应用数据。 |
客户端存储?
¥Client-side storage?
在 MDN 学习区的其他地方,我们讨论了 静态站点 和 动态站点 之间的区别。大多数主要的现代网站都是动态的 - 它们使用某种数据库(服务器端存储)将数据存储在服务器上,然后运行 server-side 代码来检索所需的数据,将其插入到静态页面模板中,并将生成的 HTML 提供给客户端 由用户的浏览器显示。
¥Elsewhere in the MDN learning area, we talked about the difference between static sites and dynamic sites. Most major modern websites are dynamic — they store data on the server using some kind of database (server-side storage), then run server-side code to retrieve needed data, insert it into static page templates, and serve the resulting HTML to the client to be displayed by the user's browser.
客户端存储的工作原理类似,但用途不同。它由 JavaScript API 组成,允许你在客户端(即用户的计算机上)存储数据,然后在需要时检索它。这有许多不同的用途,例如:
¥Client-side storage works on similar principles, but has different uses. It consists of JavaScript APIs that allow you to store data on the client (i.e. on the user's machine) and then retrieve it when needed. This has many distinct uses, such as:
- 个性化网站首选项(例如,显示用户对自定义小部件、配色方案或字体大小的选择)。
- 保留先前的站点活动(例如,存储先前会话中购物车的内容、记住用户先前是否登录)。
- 在本地保存数据和资源,以便网站下载速度更快(并且可能更便宜),或者无需网络连接即可使用。
- 将 Web 应用生成的文档保存在本地以供离线使用
通常客户端和服务器端存储一起使用。例如,你可以下载一批音乐文件(可能由网页游戏或音乐播放器应用使用),将它们存储在客户端数据库中,并根据需要播放它们。用户只需下载一次音乐文件 - 在随后的访问中,将从数据库中检索它们。
¥Often client-side and server-side storage are used together. For example, you could download a batch of music files (perhaps used by a web game or music player application), store them inside a client-side database, and play them as needed. The user would only have to download the music files once — on subsequent visits they would be retrieved from the database instead.
注意:使用客户端存储 API 可以存储的数据量存在限制(可能是每个单独的 API 以及累积的数据量);确切的限制取决于浏览器并且可能取决于用户设置。请参阅 浏览器存储配额和驱逐标准 了解更多信息。
¥Note: There are limits to the amount of data you can store using client-side storage APIs (possibly both per individual API and cumulatively); the exact limit varies depending on the browser and possibly based on user settings. See Browser storage quotas and eviction criteria for more information.
老套:Cookies
¥Old school: Cookies
客户端存储的概念已经存在很长时间了。自网络诞生之初起,网站就使用 cookies 来存储信息,以个性化网站上的用户体验。它们是网络上常用的最早的客户端存储形式。
¥The concept of client-side storage has been around for a long time. Since the early days of the web, sites have used cookies to store information to personalize user experience on websites. They're the earliest form of client-side storage commonly used on the web.
如今,有更简单的机制可用于存储客户端数据,因此我们不会在本文中教你如何使用 cookie。然而,这并不意味着 cookie 在现代网络上完全无用 - 它们仍然普遍用于存储与用户个性化和状态相关的数据,例如 会话 ID 和访问令牌。有关 cookie 的更多信息,请参阅我们的 使用 HTTP cookie 文章。
¥These days, there are easier mechanisms available for storing client-side data, therefore we won't be teaching you how to use cookies in this article. However, this does not mean cookies are completely useless on the modern-day web — they are still used commonly to store data related to user personalization and state, e.g. session IDs and access tokens. For more information on cookies see our Using HTTP cookies article.
新学校:Web 存储和 IndexedDB
¥New school: Web Storage and IndexedDB
我们上面提到的 "easier" 的特点如下:
¥The "easier" features we mentioned above are as follows:
- Web 存储 API 提供了一种用于存储和检索由名称和相应值组成的较小数据项的机制。当你只需要存储一些简单数据(例如用户名、是否登录、屏幕背景使用什么颜色等)时,这非常有用。
- 索引数据库 API 为浏览器提供了完整的数据库系统来存储复杂的数据。这可用于从完整的客户记录集到复杂的数据类型(例如音频或视频文件)。
你将在下面了解有关这些 API 的更多信息。
¥You'll learn more about these APIs below.
缓存 API
¥The Cache API
Cache API 设计用于存储对特定请求的 HTTP 响应,对于执行离线存储网站资源等操作非常有用,以便随后可以在没有网络连接的情况下使用该网站。缓存通常与 服务工作者 API 结合使用,但并非必须如此。
¥The Cache API is designed for storing HTTP responses to specific requests, and is very useful for doing things like storing website assets offline so the site can subsequently be used without a network connection. Cache is usually used in combination with the Service Worker API, although it doesn't have to be.
缓存和服务工作线程的使用是一个高级主题,尽管我们将在下面的 离线资源存储 部分中展示一个示例,但我们不会在本文中对其进行详细介绍。
¥The use of Cache and Service Workers is an advanced topic, and we won't be covering it in great detail in this article, although we will show an example in the Offline asset storage section below.
存储简单数据 - 网络存储
¥Storing simple data — web storage
Web 存储 API 非常易于使用 - 你可以存储简单的数据名称/值对(仅限于字符串、数字等)并在需要时检索这些值。
¥The Web Storage API is very easy to use — you store simple name/value pairs of data (limited to strings, numbers, etc.) and retrieve these values when needed.
基本语法
¥Basic syntax
让我们向你展示如何:
¥Let's show you how:
- 首先,转到 GitHub 上的 网络存储空白模板(在新选项卡中打开)。
- 打开浏览器开发者工具的 JavaScript 控制台。
-
所有网络存储数据都包含在浏览器内的两个类似对象的结构中:
sessionStorage和localStorage。第一个在浏览器打开时保留数据(浏览器关闭时数据会丢失),第二个即使在浏览器关闭然后再次打开后也保留数据。我们将在本文中使用第二个,因为它通常更有用。Storage.setItem()方法允许你将数据项保存在存储中 - 它需要两个参数:物品的名称及其价值。尝试在 JavaScript 控制台中输入以下内容(如果你愿意,请将值更改为你自己的名字!):jslocalStorage.setItem("name", "Chris"); Storage.getItem()方法采用一个参数(你要检索的数据项的名称)并返回该项的值。现在将这些行输入到 JavaScript 控制台中:输入第二行后,你应该看到jslet myName = localStorage.getItem("name"); myName;myName变量现在包含name数据项的值。Storage.removeItem()方法采用一个参数 - 你要删除的数据项的名称 - 并将该项目从 Web 存储中删除。在 JavaScript 控制台中输入以下几行:第三行现在应该返回jslocalStorage.removeItem("name"); myName = localStorage.getItem("name"); myName;null—name项不再存在于网络存储中。
数据依然存在!
¥The data persists!
Web 存储的一个关键特性是数据在页面加载之间持续存在(甚至在浏览器关闭时,在 localStorage 的情况下)。让我们看看实际情况。
¥One key feature of web storage is that the data persists between page loads (and even when the browser is shut down, in the case of localStorage). Let's look at this in action.
- 再次打开我们的网络存储空白模板,但这次使用与打开本教程的浏览器不同的浏览器!这样会更容易处理。
- 在浏览器的 JavaScript 控制台中输入以下几行:
你应该看到返回的名称项。js
localStorage.setItem("name", "Chris"); let myName = localStorage.getItem("name"); myName; - 现在关闭浏览器并再次打开它。
- 再次输入以下行:
你应该看到该值仍然可用,即使浏览器已关闭然后再次打开也是如此。js
let myName = localStorage.getItem("name");
myName;
每个域单独存储
¥Separate storage for each domain
每个域都有一个单独的数据存储(浏览器中加载的每个单独的网址)。你将看到,如果你加载两个网站(例如 google.com 和 amazon.com)并尝试在一个网站上存储一项内容,则该项目将无法供另一网站使用。
¥There is a separate data store for each domain (each separate web address loaded in the browser). You will see that if you load two websites (say google.com and amazon.com) and try storing an item on one website, it won't be available to the other website.
这是有道理的 - 你可以想象如果网站可以看到彼此的数据将会出现的安全问题!
¥This makes sense — you can imagine the security issues that would arise if websites could see each other's data!
一个更复杂的例子
¥A more involved example
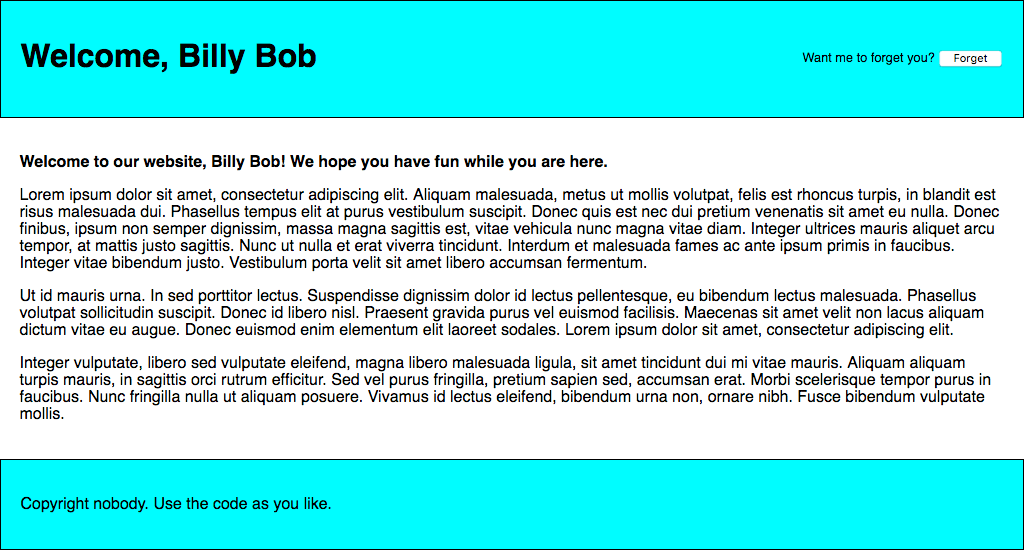
让我们通过编写一个工作示例来应用这些新发现的知识,让你了解如何使用网络存储。我们的示例将允许你输入名称,之后页面将更新以向你提供个性化的问候语。此状态也将在页面/浏览器重新加载时持续存在,因为名称存储在 Web 存储中。
¥Let's apply this new-found knowledge by writing a working example to give you an idea of how web storage can be used. Our example will allow you to enter a name, after which the page will update to give you a personalized greeting. This state will also persist across page/browser reloads, because the name is stored in web storage.
你可以在 personal-greeting.html 找到示例 HTML — 其中包含一个带有页眉、内容和页脚的网站,以及一个用于输入你的名称的表单。
¥You can find the example HTML at personal-greeting.html — this contains a website with a header, content, and footer, and a form for entering your name.
让我们构建这个示例,以便你了解它是如何工作的。
¥Let's build up the example, so you can understand how it works.
- 首先,在计算机上的新目录中制作 personal-greeting.html 文件的本地副本。
- 接下来,请注意我们的 HTML 如何引用名为
index.js的 JavaScript 文件,其中包含诸如<script src="index.js" defer></script>之类的行。我们需要创建它并将 JavaScript 代码写入其中。在与 HTML 文件相同的目录中创建index.js文件。 - 我们将首先创建对本示例中需要操作的所有 HTML 功能的引用 - 我们将它们全部创建为常量,因为这些引用不需要在应用的生命周期中更改。将以下行添加到你的 JavaScript 文件中:
js
// create needed constants const rememberDiv = document.querySelector(".remember"); const forgetDiv = document.querySelector(".forget"); const form = document.querySelector("form"); const nameInput = document.querySelector("#entername"); const submitBtn = document.querySelector("#submitname"); const forgetBtn = document.querySelector("#forgetname"); const h1 = document.querySelector("h1"); const personalGreeting = document.querySelector(".personal-greeting"); - 接下来,我们需要包含一个小型事件监听器,以阻止表单在按下提交按钮时实际提交自身,因为这不是我们想要的行为。将此代码段添加到你之前的代码下方:
js
// Stop the form from submitting when a button is pressed form.addEventListener("submit", (e) => e.preventDefault()); - 现在我们需要添加一个事件监听器,当单击 "问好" 按钮时将运行该事件监听器的处理函数。这些注释详细解释了每一位的作用,但本质上,我们在这里获取用户在文本输入框中输入的名称,并使用
setItem()将其保存在网络存储中,然后运行一个名为nameDisplayCheck()的函数来处理更新实际网站 文本。将其添加到代码底部:js// run function when the 'Say hello' button is clicked submitBtn.addEventListener("click", () => { // store the entered name in web storage localStorage.setItem("name", nameInput.value); // run nameDisplayCheck() to sort out displaying the personalized greetings and updating the form display nameDisplayCheck(); }); - 此时,我们还需要一个事件处理程序来在单击 "忘记" 按钮时运行函数 - 仅在单击 "问好" 按钮后才显示(两个表单状态来回切换)。在此函数中,我们使用
removeItem()从网络存储中删除name项目,然后再次运行nameDisplayCheck()来更新显示。将其添加到底部:js// run function when the 'Forget' button is clicked forgetBtn.addEventListener("click", () => { // Remove the stored name from web storage localStorage.removeItem("name"); // run nameDisplayCheck() to sort out displaying the generic greeting again and updating the form display nameDisplayCheck(); }); - 现在是时候定义
nameDisplayCheck()函数本身了。这里我们使用localStorage.getItem('name')作为条件测试来检查名称项是否已存储在 Web 存储中。如果名称已被存储,则此调用的计算结果为true;如果不是,则该调用的计算结果为false。如果调用评估结果为true,我们将显示个性化问候语,显示表单的 "forget" 部分,并隐藏表单的 "问好" 部分。如果调用评估结果为false,我们将显示通用问候语并执行相反的操作。再次将以下代码放在底部:js// define the nameDisplayCheck() function function nameDisplayCheck() { // check whether the 'name' data item is stored in web Storage if (localStorage.getItem("name")) { // If it is, display personalized greeting const name = localStorage.getItem("name"); h1.textContent = `Welcome, ${name}`; personalGreeting.textContent = `Welcome to our website, ${name}! We hope you have fun while you are here.`; // hide the 'remember' part of the form and show the 'forget' part forgetDiv.style.display = "block"; rememberDiv.style.display = "none"; } else { // if not, display generic greeting h1.textContent = "Welcome to our website "; personalGreeting.textContent = "Welcome to our website. We hope you have fun while you are here."; // hide the 'forget' part of the form and show the 'remember' part forgetDiv.style.display = "none"; rememberDiv.style.display = "block"; } } - 最后但并非最不重要的一点是,我们需要在页面加载时运行
nameDisplayCheck()函数。如果我们不这样做,那么个性化问候语将不会在页面重新加载后持续存在。将以下内容添加到代码底部:jsnameDisplayCheck();
你的示例已完成 - 干得好!现在剩下的就是保存代码并在浏览器中测试 HTML 页面。你可以看到我们的 完成版本在这里运行。
¥Your example is finished — well done! All that remains now is to save your code and test your HTML page in a browser. You can see our finished version running live here.
注意:在 使用网络存储 API 中还有另一个稍微复杂的示例需要探索。
¥Note: There is another, slightly more complex example to explore at Using the Web Storage API.
注意:在我们完成版本的源代码的第
<script src="index.js" defer></script>行中,defer属性指定在页面加载完成之前不会执行<script>元素的内容。¥Note: In the line
<script src="index.js" defer></script>of the source for our finished version, thedeferattribute specifies that the contents of the<script>element will not execute until the page has finished loading.
存储复杂数据 - IndexedDB
¥Storing complex data — IndexedDB
索引数据库 API(有时缩写为 IDB)是浏览器中可用的完整数据库系统,你可以在其中存储复杂的相关数据,其类型不限于字符串或数字等简单值。你可以在 IndexedDB 实例中存储视频、图片和几乎任何其他内容。
¥The IndexedDB API (sometimes abbreviated IDB) is a complete database system available in the browser in which you can store complex related data, the types of which aren't limited to simple values like strings or numbers. You can store videos, images, and pretty much anything else in an IndexedDB instance.
IndexedDB API 允许你创建数据库,然后在该数据库中创建对象存储。对象存储就像关系数据库中的表,每个对象存储可以包含多个对象。要了解有关 IndexedDB API 的更多信息,请参阅 使用索引数据库。
¥The IndexedDB API allows you to create a database, then create object stores within that database. Object stores are like tables in a relational database, and each object store can contain a number of objects. To learn more about the IndexedDB API, see Using IndexedDB.
然而,这确实是有代价的:IndexedDB 使用起来比 Web Storage API 复杂得多。在本节中,我们实际上只会触及其功能的表面,但我们将为你提供足够的入门信息。
¥However, this does come at a cost: IndexedDB is much more complex to use than the Web Storage API. In this section, we'll really only scratch the surface of what it is capable of, but we will give you enough to get started.
完成注意存储示例
¥Working through a note storage example
在这里,我们将向你介绍一个示例,该示例允许你在浏览器中存储注释并随时查看和删除它们,让你自己构建它,并在我们进行过程中解释 IDB 的最基本部分。
¥Here we'll run you through an example that allows you to store notes in your browser and view and delete them whenever you like, getting you to build it up for yourself and explaining the most fundamental parts of IDB as we go along.
该应用看起来像这样:
¥The app looks something like this:
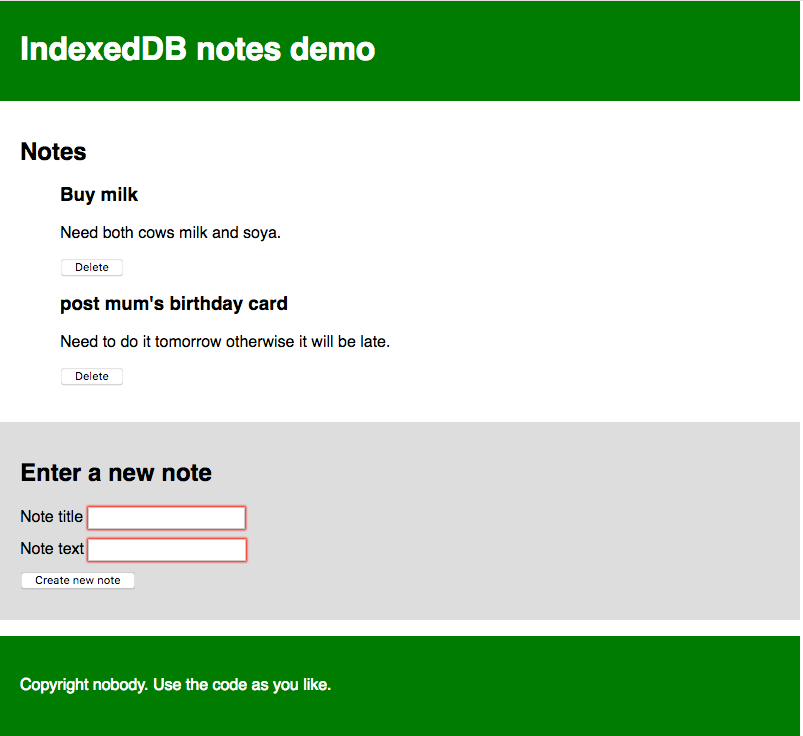
每个注意都有一个标题和一些正文,每个都可以单独编辑。我们下面将要介绍的 JavaScript 代码包含详细的注释,可帮助你了解正在发生的情况。
¥Each note has a title and some body text, each individually editable. The JavaScript code we'll go through below has detailed comments to help you understand what's going on.
入门
¥Getting started
- 首先,将
index.html、style.css和index-start.js文件的本地副本复制到本地计算机上的新目录中。 - 看看这些文件。你将看到 HTML 定义了一个带有页眉和页脚的网站,以及一个包含显示注释的位置的主要内容区域,以及一个用于将新注释输入数据库的表单。CSS 提供了一些样式来使发生的事情更加清晰。JavaScript 文件包含五个声明的常量,其中包含对将显示注释的
<ul>元素、标题和正文<input>元素、<form>本身以及<button>的引用。 - 将 JavaScript 文件重命名为
index.js。现在你可以开始向其中添加代码了。
数据库初始设置
¥Database initial setup
现在让我们看看我们首先需要做什么,以实际设置数据库。
¥Now let's look at what we have to do in the first place, to actually set up a database.
- 在常量声明下方,添加以下行:
这里我们声明了一个名为js
// Create an instance of a db object for us to store the open database in let db;db的变量 - 稍后它将用于存储代表我们数据库的对象。我们将在几个地方使用它,因此我们在这里全局声明它以使事情变得更容易。 -
接下来,添加以下内容:
此行创建一个打开名为js
// Open our database; it is created if it doesn't already exist // (see the upgradeneeded handler below) const openRequest = window.indexedDB.open("notes_db", 1);notes_db的数据库的版本1的请求。如果它尚不存在,它将通过后续代码为你创建。你将看到这种请求模式在 IndexedDB 中经常使用。数据库操作需要时间。你不想在等待结果时挂起浏览器,因此数据库操作是 asynchronous,这意味着它们不会立即发生,而是在将来的某个时刻发生,并且在完成时你会收到通知。 为了在 IndexedDB 中处理这个问题,你创建一个请求对象(你可以将其命名为任何你喜欢的名称 - 我们在这里将其称为openRequest,因此很明显它的用途)。然后,你可以使用事件处理程序在请求完成、失败等时运行代码,你将在下面看到它的使用情况。注意:版本号很重要。如果你想升级数据库(例如,通过更改表结构),则必须使用增加的版本号、在
upgradeneeded处理程序中指定不同的架构(见下文)等再次运行代码。我们不会介绍 在本教程中升级数据库。¥Note: The version number is important. If you want to upgrade your database (for example, by changing the table structure), you have to run your code again with an increased version number, different schema specified inside the
upgradeneededhandler (see below), etc. We won't cover upgrading databases in this tutorial. -
现在,在之前添加的事件处理程序下方添加以下事件处理程序:
如果系统返回请求失败,则js
// error handler signifies that the database didn't open successfully openRequest.addEventListener("error", () => console.error("Database failed to open"), ); // success handler signifies that the database opened successfully openRequest.addEventListener("success", () => { console.log("Database opened successfully"); // Store the opened database object in the db variable. This is used a lot below db = openRequest.result; // Run the displayData() function to display the notes already in the IDB displayData(); });error事件处理程序将运行。这使你能够响应此问题。在我们的示例中,我们只是将一条消息打印到 JavaScript 控制台。 如果请求成功返回,则success事件处理程序将运行,这意味着数据库已成功打开。如果是这种情况,代表打开的数据库的对象在openRequest.result属性中变得可用,允许我们操作数据库。我们将其存储在之前创建的db变量中以供以后使用。我们还运行一个名为displayData()的函数,它显示<ul>内数据库中的数据。我们现在运行它,以便页面加载后立即显示数据库中已有的注释。稍后你将看到displayData()的定义。 -
最后,在本节中,我们将添加可能是最重要的事件处理程序以设置数据库:
upgradeneeded。如果尚未设置数据库,或者使用比现有存储的数据库更大的版本号打开数据库(执行升级时),则会运行此处理程序。在之前的处理程序下方添加以下代码:这是我们定义数据库模式(结构)的地方;也就是说,它包含的列(或字段)集。这里,我们首先从事件目标(js// Set up the database tables if this has not already been done openRequest.addEventListener("upgradeneeded", (e) => { // Grab a reference to the opened database db = e.target.result; // Create an objectStore in our database to store notes and an auto-incrementing key // An objectStore is similar to a 'table' in a relational database const objectStore = db.createObjectStore("notes_os", { keyPath: "id", autoIncrement: true, }); // Define what data items the objectStore will contain objectStore.createIndex("title", "title", { unique: false }); objectStore.createIndex("body", "body", { unique: false }); console.log("Database setup complete"); });e.target.result)的result属性(即request对象)获取对现有数据库的引用。这相当于success事件处理程序中的db = openRequest.result;行,但我们需要在这里单独执行此操作,因为upgradeneeded事件处理程序(如果需要)将在success事件处理程序之前运行,这意味着如果我们 没有这样做。 然后,我们使用IDBDatabase.createObjectStore()在打开的数据库中创建一个名为notes_os的新对象存储。这相当于传统数据库系统中的单个表。我们给它起了一个名字:notes,并且还指定了一个名为id的autoIncrement键字段 - 在每个新记录中,这将自动被赋予一个递增的值 - 开发者不需要显式地设置它。作为键,id字段将用于唯一标识记录,例如在删除或显示记录时。 我们还使用IDBObjectStore.createIndex()方法创建另外两个索引(字段):title(将包含每个注释的标题)和body(将包含注释的正文)。
因此,设置好这个数据库模式后,当我们开始向数据库添加记录时,每一条记录都将表示为一个对象,如下所示:
¥So with this database schema set up, when we start adding records to the database, each one will be represented as an object along these lines:
{
  "title": "Buy milk",
  "body": "Need both cows milk and soy.",
  "id": 8
}
将数据添加到数据库
¥Adding data to the database
现在让我们看看如何向数据库添加记录。这将使用我们页面上的表格来完成。
¥Now let's look at how we can add records to the database. This will be done using the form on our page.
在之前的事件处理程序下方,添加以下行,该行设置一个 submit 事件处理程序,该处理程序在提交表单时(当按下提交 <button> 导致表单提交成功时)运行名为 addData() 的函数:
¥Below your previous event handler, add the following line, which sets up a submit event handler that runs a function called addData() when the form is submitted (when the submit <button> is pressed leading to a successful form submission):
// Create a submit event handler so that when the form is submitted the addData() function is run
form.addEventListener("submit", addData);
现在让我们定义 addData() 函数。将其添加到上一行下方:
¥Now let's define the addData() function. Add this below your previous line:
// Define the addData() function
function addData(e) {
  // prevent default - we don't want the form to submit in the conventional way
  e.preventDefault();

  // grab the values entered into the form fields and store them in an object ready for being inserted into the DB
  const newItem = { title: titleInput.value, body: bodyInput.value };

  // open a read/write db transaction, ready for adding the data
  const transaction = db.transaction(["notes_os"], "readwrite");

  // call an object store that's already been added to the database
  const objectStore = transaction.objectStore("notes_os");

  // Make a request to add our newItem object to the object store
  const addRequest = objectStore.add(newItem);

  addRequest.addEventListener("success", () => {
    // Clear the form, ready for adding the next entry
    titleInput.value = "";
    bodyInput.value = "";
  });

  // Report on the success of the transaction completing, when everything is done
  transaction.addEventListener("complete", () => {
    console.log("Transaction completed: database modification finished.");

    // update the display of data to show the newly added item, by running displayData() again.
    displayData();
  });

  transaction.addEventListener("error", () =>
    console.log("Transaction not opened due to error"),
  );
}
这是相当复杂的;分解它,我们:
¥This is quite complex; breaking it down, we:
- 在事件对象上运行
Event.preventDefault()以停止以传统方式实际提交的表单(这将导致页面刷新并破坏体验)。 - 创建一个表示要输入数据库的记录的对象,并使用表单输入中的值填充该记录。请注意,我们不必显式包含
id值 - 正如我们之前所解释的,这是自动填充的。 - 使用
IDBDatabase.transaction()方法针对notes_os对象存储打开readwrite事务。该事务对象允许我们访问对象存储,以便我们可以对其执行某些操作,例如 添加新记录。 - 使用
IDBTransaction.objectStore()方法访问对象存储,将结果保存在objectStore变量中。 - 使用
IDBObjectStore.add()将新记录添加到数据库中。这将创建一个请求对象,其方式与我们之前看到的相同。 - 向
request和transaction对象添加一堆事件处理程序,以便在生命周期的关键点运行代码。请求成功后,我们清除表单输入,准备输入下一条注释。交易完成后,我们再次运行displayData()函数来更新页面上注释的显示。
显示数据
¥Displaying the data
我们已经在代码中引用了 displayData() 两次,所以我们最好定义它。将其添加到你的代码中,位于之前的函数定义下方:
¥We've referenced displayData() twice in our code already, so we'd probably better define it. Add this to your code, below the previous function definition:
// Define the displayData() function
function displayData() {
  // Here we empty the contents of the list element each time the display is updated
  // If you didn't do this, you'd get duplicates listed each time a new note is added
  while (list.firstChild) {
    list.removeChild(list.firstChild);
  }

  // Open our object store and then get a cursor - which iterates through all the
  // different data items in the store
  const objectStore = db.transaction("notes_os").objectStore("notes_os");
  objectStore.openCursor().addEventListener("success", (e) => {
    // Get a reference to the cursor
    const cursor = e.target.result;

    // If there is still another data item to iterate through, keep running this code
    if (cursor) {
      // Create a list item, h3, and p to put each data item inside when displaying it
      // structure the HTML fragment, and append it inside the list
      const listItem = document.createElement("li");
      const h3 = document.createElement("h3");
      const para = document.createElement("p");

      listItem.appendChild(h3);
      listItem.appendChild(para);
      list.appendChild(listItem);

      // Put the data from the cursor inside the h3 and para
      h3.textContent = cursor.value.title;
      para.textContent = cursor.value.body;

      // Store the ID of the data item inside an attribute on the listItem, so we know
      // which item it corresponds to. This will be useful later when we want to delete items
      listItem.setAttribute("data-note-id", cursor.value.id);

      // Create a button and place it inside each listItem
      const deleteBtn = document.createElement("button");
      listItem.appendChild(deleteBtn);
      deleteBtn.textContent = "Delete";

      // Set an event handler so that when the button is clicked, the deleteItem()
      // function is run
      deleteBtn.addEventListener("click", deleteItem);

      // Iterate to the next item in the cursor
      cursor.continue();
    } else {
      // Again, if list item is empty, display a 'No notes stored' message
      if (!list.firstChild) {
        const listItem = document.createElement("li");
        listItem.textContent = "No notes stored.";
        list.appendChild(listItem);
      }
      // if there are no more cursor items to iterate through, say so
      console.log("Notes all displayed");
    }
  });
}
再次,让我们分解一下:
¥Again, let's break this down:
- 首先,我们清空
<ul>元素的内容,然后用更新的内容填充它。如果你不这样做,你最终会在每次更新时添加大量重复内容。 - 接下来,我们使用
IDBDatabase.transaction()和IDBTransaction.objectStore()获取对notes_os对象存储的引用,就像我们在addData()中所做的那样,只不过这里我们将它们链接在一起。 - 下一步是使用
IDBObjectStore.openCursor()方法打开游标请求 - 这是一个可用于迭代对象存储中的记录的构造。我们将success事件处理程序链接到该行的末尾,以使代码更加简洁 - 当光标成功返回时,处理程序就会运行。 - 我们使用
const cursor = e.target.result获取对光标本身(IDBCursor对象)的引用。 - 接下来,我们检查光标是否包含来自数据存储 (
if (cursor){ }) 的记录 - 如果是,我们创建一个 DOM 片段,用记录中的数据填充它,并将其插入到页面中(在<ul>元素内)。我们还包含一个删除按钮,单击该按钮后,将通过运行deleteItem()函数来删除该注释,我们将在下一节中介绍该函数。 - 在
if块的末尾,我们使用IDBCursor.continue()方法将光标前进到数据存储中的下一条记录,并再次运行if块的内容。如果还有另一条记录要迭代,则会将其插入到页面中,然后再次运行continue(),依此类推。 - 当没有更多记录可供迭代时,
cursor将返回undefined,因此else块将代替if块运行。该块检查是否有任何注释插入到<ul>中 - 如果没有,它会插入一条消息,表示没有存储注释。
删除注释
¥Deleting a note
如上所述,当按下注释的删除按钮时,该注释将被删除。这是通过 deleteItem() 函数实现的,如下所示:
¥As stated above, when a note's delete button is pressed, the note is deleted. This is achieved by the deleteItem() function, which looks like so:
// Define the deleteItem() function
function deleteItem(e) {
  // retrieve the name of the task we want to delete. We need
  // to convert it to a number before trying to use it with IDB; IDB key
  // values are type-sensitive.
  const noteId = Number(e.target.parentNode.getAttribute("data-note-id"));

  // open a database transaction and delete the task, finding it using the id we retrieved above
  const transaction = db.transaction(["notes_os"], "readwrite");
  const objectStore = transaction.objectStore("notes_os");
  const deleteRequest = objectStore.delete(noteId);

  // report that the data item has been deleted
  transaction.addEventListener("complete", () => {
    // delete the parent of the button
    // which is the list item, so it is no longer displayed
    e.target.parentNode.parentNode.removeChild(e.target.parentNode);
    console.log(`Note ${noteId} deleted.`);

    // Again, if list item is empty, display a 'No notes stored' message
    if (!list.firstChild) {
      const listItem = document.createElement("li");
      listItem.textContent = "No notes stored.";
      list.appendChild(listItem);
    }
  });
}
- 第一部分需要一些解释 - 我们使用
Number(e.target.parentNode.getAttribute('data-note-id'))检索要删除的记录的 ID - 回想一下,当第一次显示该记录时,该记录的 ID 保存在<li>上的data-note-id属性中。然而,我们确实需要通过全局内置Number()对象传递该属性,因为它是字符串数据类型,因此数据库无法识别该属性,因为数据库需要一个数字。 - 然后,我们使用之前看到的相同模式获取对对象存储的引用,并使用
IDBObjectStore.delete()方法从数据库中删除记录,并向其传递 ID。 - 当数据库事务完成时,我们从 DOM 中删除注释的
<li>,然后再次检查<ul>现在是否为空,并根据需要插入注释。
就是这样了!你的示例现在应该可以工作了。
¥So that's it! Your example should now work.
如果你遇到问题,请随时查看 根据我们的实例进行检查(另请参阅 源代码)。
¥If you are having trouble with it, feel free to check it against our live example (see the source code also).
通过 IndexedDB 存储复杂数据
¥Storing complex data via IndexedDB
正如我们上面提到的,IndexedDB 不仅仅可以用于存储文本字符串。你几乎可以存储任何你想要的内容,包括视频或图片 blob 等复杂对象。而且它并不比任何其他类型的数据更难实现。
¥As we mentioned above, IndexedDB can be used to store more than just text strings. You can store just about anything you want, including complex objects such as video or image blobs. And it isn't much more difficult to achieve than any other type of data.
为了演示如何做到这一点,我们编写了另一个名为 IndexedDB 视频存储 的示例(参见 也在这里实时运行)。当你第一次运行该示例时,它会从网络下载所有视频,将它们存储在 IndexedDB 数据库中,然后在 UI 中的 <video> 元素内显示视频。第二次运行它时,它会在数据库中查找视频并从那里获取它们,然后再显示它们 - 这使得后续加载速度更快,并且占用的带宽更少。
¥To demonstrate how to do it, we've written another example called IndexedDB video store (see it running live here also). When you first run the example, it downloads all the videos from the network, stores them in an IndexedDB database, and then displays the videos in the UI inside <video> elements. The second time you run it, it finds the videos in the database and gets them from there instead before displaying them — this makes subsequent loads much quicker and less bandwidth-hungry.
让我们来看看这个例子中最有趣的部分。我们不会全部查看 - 其中很多内容与前面的示例类似,并且代码有很好的注释。
¥Let's walk through the most interesting parts of the example. We won't look at it all — a lot of it is similar to the previous example, and the code is well-commented.
- 在此示例中,我们将要获取的视频名称存储在对象数组中:
js
const videos = [ { name: "crystal" }, { name: "elf" }, { name: "frog" }, { name: "monster" }, { name: "pig" }, { name: "rabbit" }, ]; -
首先,成功打开数据库后,我们运行
init()函数。这会循环遍历不同的视频名称,尝试从videos数据库中加载由每个名称标识的记录。 如果在数据库中找到每个视频(通过查看request.result的计算结果是否为true进行检查 - 如果记录不存在,则为undefined),其视频文件(存储为 blob)和视频名称将直接传递给displayVideo()函数 将它们放置在 UI 中。如果没有,视频名称将传递给fetchVideoFromNetwork()函数,你猜对了,从网络获取视频。jsfunction init() { // Loop through the video names one by one for (const video of videos) { // Open transaction, get object store, and get() each video by name const objectStore = db.transaction("videos_os").objectStore("videos_os"); const request = objectStore.get(video.name); request.addEventListener("success", () => { // If the result exists in the database (is not undefined) if (request.result) { // Grab the videos from IDB and display them using displayVideo() console.log("taking videos from IDB"); displayVideo( request.result.mp4, request.result.webm, request.result.name, ); } else { // Fetch the videos from the network fetchVideoFromNetwork(video); } }); } } -
以下片段取自
fetchVideoFromNetwork()内部 - 这里我们使用两个单独的fetch()请求获取视频的 MP4 和 WebM 版本。然后,我们使用Response.blob()方法将每个响应的主体提取为 blob,为我们提供可以稍后存储和显示的视频的对象表示。 但我们这里有一个问题 - 这两个请求都是异步的,但我们只想在两个承诺都满足时尝试显示或存储视频。幸运的是,有一个内置方法可以处理这样的问题 -Promise.all()。这需要一个参数 - 引用你想要检查放置在数组中是否履行的所有单个承诺 - 并返回一个承诺,当所有单个承诺都履行时,该承诺就会履行。 在这个 Promise 的then()处理程序中,我们像之前一样调用displayVideo()函数来在 UI 中显示视频,然后我们还调用storeVideo()函数将这些视频存储在数据库中。js// Fetch the MP4 and WebM versions of the video using the fetch() function, // then expose their response bodies as blobs const mp4Blob = fetch(`videos/${video.name}.mp4`).then((response) => response.blob(), ); const webmBlob = fetch(`videos/${video.name}.webm`).then((response) => response.blob(), ); // Only run the next code when both promises have fulfilled Promise.all([mp4Blob, webmBlob]).then((values) => { // display the video fetched from the network with displayVideo() displayVideo(values[0], values[1], video.name); // store it in the IDB using storeVideo() storeVideo(values[0], values[1], video.name); }); - 我们先看
storeVideo()。这与你在上一个示例中看到的向数据库添加数据的模式非常相似 - 我们打开一个readwrite事务并获取对videos_os对象存储的引用,创建一个表示要添加到数据库的记录的对象,然后添加它 使用IDBObjectStore.add()。js// Define the storeVideo() function function storeVideo(mp4, webm, name) { // Open transaction, get object store; make it a readwrite so we can write to the IDB const objectStore = db .transaction(["videos_os"], "readwrite") .objectStore("videos_os"); // Add the record to the IDB using add() const request = objectStore.add({ mp4, webm, name }); request.addEventListener("success", () => console.log("Record addition attempt finished"), ); request.addEventListener("error", () => console.error(request.error)); } - 最后,我们有
displayVideo(),它创建在 UI 中插入视频所需的 DOM 元素,然后将它们附加到页面。其中最有趣的部分如下所示 - 要在<video>元素中实际显示我们的视频 blob,我们需要使用URL.createObjectURL()方法创建对象 URL(指向存储在内存中的视频 blob 的内部 URL)。完成后,我们可以将对象 URL 设置为<source>元素的src属性的值,并且效果很好。js// Define the displayVideo() function function displayVideo(mp4Blob, webmBlob, title) { // Create object URLs out of the blobs const mp4URL = URL.createObjectURL(mp4Blob); const webmURL = URL.createObjectURL(webmBlob); // Create DOM elements to embed video in the page const article = document.createElement("article"); const h2 = document.createElement("h2"); h2.textContent = title; const video = document.createElement("video"); video.controls = true; const source1 = document.createElement("source"); source1.src = mp4URL; source1.type = "video/mp4"; const source2 = document.createElement("source"); source2.src = webmURL; source2.type = "video/webm"; // Embed DOM elements into page section.appendChild(article); article.appendChild(h2); article.appendChild(video); video.appendChild(source1); video.appendChild(source2); }
离线资源存储
¥Offline asset storage
上面的示例已经展示了如何创建一个应用,将大量资源存储在 IndexedDB 数据库中,从而避免多次下载它们。这对于用户体验来说已经是一个很大的改进,但是还缺少一件事 - 每次访问网站时仍然需要下载主要的 HTML、CSS 和 JavaScript 文件,这意味着当有 无网络连接。
¥The above example already shows how to create an app that will store large assets in an IndexedDB database, avoiding the need to download them more than once. This is already a great improvement to the user experience, but there is still one thing missing — the main HTML, CSS, and JavaScript files still need to be downloaded each time the site is accessed, meaning that it won't work when there is no network connection.
这就是 服务工作进程 和密切相关的 缓存 API 的用武之地。
¥This is where Service workers and the closely-related Cache API come in.
Service Worker 是一个 JavaScript 文件,当浏览器访问该文件时,该文件会针对特定来源(网站或特定域的网站的一部分)进行注册。注册后,它可以控制该源的可用页面。它通过位于加载的页面和网络之间并拦截针对该来源的网络请求来实现这一点。
¥A service worker is a JavaScript file that is registered against a particular origin (website, or part of a website at a certain domain) when it is accessed by a browser. When registered, it can control pages available at that origin. It does this by sitting between a loaded page and the network and intercepting network requests aimed at that origin.
当它拦截请求时,它可以执行你希望执行的任何操作(请参阅 用例想法),但经典示例是离线保存网络响应,然后提供响应请求而不是来自网络的响应。实际上,它允许你使网站完全离线工作。
¥When it intercepts a request, it can do anything you wish to it (see use case ideas), but the classic example is saving the network responses offline and then providing those in response to a request instead of the responses from the network. In effect, it allows you to make a website work completely offline.
Cache API 是另一种客户端存储机制,有一点不同 - 它旨在保存 HTTP 响应,因此与服务工作人员配合得很好。
¥The Cache API is another client-side storage mechanism, with a bit of a difference — it is designed to save HTTP responses, and so works very well with service workers.
服务工作者示例
¥A service worker example
让我们看一个例子,让你稍微了解一下这可能是什么样子。我们创建了上一节中看到的视频商店示例的另一个版本 - 其功能相同,只是它还通过服务工作线程将 HTML、CSS 和 JavaScript 保存在缓存 API 中,从而允许示例离线运行!
¥Let's look at an example, to give you a bit of an idea of what this might look like. We have created another version of the video store example we saw in the previous section — this functions identically, except that it also saves the HTML, CSS, and JavaScript in the Cache API via a service worker, allowing the example to run offline!
参见 IndexedDB 视频存储与正在运行的 Service Worker,也参见 查看源代码。
¥See IndexedDB video store with service worker running live, and also see the source code.
注册 Service Worker
¥Registering the service worker
首先要注意的是,主 JavaScript 文件中放置了一些额外的代码(请参阅 index.js)。首先,我们进行特性检测测试,看看 serviceWorker 成员在 Navigator 对象中是否可用。如果返回 true,那么我们就知道至少支持了 Service Worker 的基础知识。在这里,我们使用 ServiceWorkerContainer.register() 方法根据其所在的源注册 sw.js 文件中包含的 Service Worker,因此它可以控制与其所在目录或子目录中的页面。当其承诺兑现时,Service Worker 就被视为已注册。
¥The first thing to note is that there's an extra bit of code placed in the main JavaScript file (see index.js). First, we do a feature detection test to see if the serviceWorker member is available in the Navigator object. If this returns true, then we know that at least the basics of service workers are supported. Inside here we use the ServiceWorkerContainer.register() method to register a service worker contained in the sw.js file against the origin it resides at, so it can control pages in the same directory as it, or subdirectories. When its promise fulfills, the service worker is deemed registered.
// Register service worker to control making site work offline
if ("serviceWorker" in navigator) {
  navigator.serviceWorker
    .register(
      "/learning-area/javascript/apis/client-side-storage/cache-sw/video-store-offline/sw.js",
    )
    .then(() => console.log("Service Worker Registered"));
}
注意:
sw.js文件的给定路径是相对于站点源的,而不是相对于包含代码的 JavaScript 文件。服务工作进程在https://mdn.github.io/learning-area/javascript/apis/client-side-storage/cache-sw/video-store-offline/sw.js。原点是https://mdn.github.io,因此给定的路径必须是/learning-area/javascript/apis/client-side-storage/cache-sw/video-store-offline/sw.js。如果你想在自己的服务器上托管此示例,则必须对此进行相应更改。这相当令人困惑,但出于安全原因它必须以这种方式工作。¥Note: The given path to the
sw.jsfile is relative to the site origin, not the JavaScript file that contains the code. The service worker is athttps://mdn.github.io/learning-area/javascript/apis/client-side-storage/cache-sw/video-store-offline/sw.js. The origin ishttps://mdn.github.io, and therefore the given path has to be/learning-area/javascript/apis/client-side-storage/cache-sw/video-store-offline/sw.js. If you wanted to host this example on your own server, you'd have to change this accordingly. This is rather confusing, but it has to work this way for security reasons.
安装 Service Worker
¥Installing the service worker
下次访问 Service Worker 控制下的任何页面时(例如,重新加载示例时),Service Worker 会针对该页面安装,这意味着它将开始控制该页面。发生这种情况时,会针对 Service Worker 触发 install 事件;你可以在 Service Worker 本身内部编写代码来响应安装。
¥The next time any page under the service worker's control is accessed (e.g. when the example is reloaded), the service worker is installed against that page, meaning that it will start controlling it. When this occurs, an install event is fired against the service worker; you can write code inside the service worker itself that will respond to the installation.
让我们看一下 sw.js 文件(服务工作线程)中的示例。你将看到安装监听器已针对 self 注册。这个 self 关键字是一种从 Service Worker 文件内部引用 Service Worker 全局范围的方法。
¥Let's look at an example, in the sw.js file (the service worker). You'll see that the install listener is registered against self. This self keyword is a way to refer to the global scope of the service worker from inside the service worker file.
在 install 处理程序内部,我们使用事件对象上可用的 ExtendableEvent.waitUntil() 方法来指示浏览器在成功履行其中的 Promise 之前不应完成 Service Worker 的安装。
¥Inside the install handler, we use the ExtendableEvent.waitUntil() method, available on the event object, to signal that the browser shouldn't complete installation of the service worker until after the promise inside it has fulfilled successfully.
在这里我们可以看到 Cache API 的运行情况。我们使用 CacheStorage.open() 方法打开一个新的缓存对象,可以在其中存储响应(类似于 IndexedDB 对象存储)。这个承诺通过代表 video-store 缓存的 Cache 对象来实现。然后,我们使用 Cache.addAll() 方法来获取一系列资源并将它们的响应添加到缓存中。
¥Here is where we see the Cache API in action. We use the CacheStorage.open() method to open a new cache object in which responses can be stored (similar to an IndexedDB object store). This promise fulfills with a Cache object representing the video-store cache. We then use the Cache.addAll() method to fetch a series of assets and add their responses to the cache.
self.addEventListener("install", (e) => {
  e.waitUntil(
    caches
      .open("video-store")
      .then((cache) =>
        cache.addAll([
          "/learning-area/javascript/apis/client-side-storage/cache-sw/video-store-offline/",
          "/learning-area/javascript/apis/client-side-storage/cache-sw/video-store-offline/index.html",
          "/learning-area/javascript/apis/client-side-storage/cache-sw/video-store-offline/index.js",
          "/learning-area/javascript/apis/client-side-storage/cache-sw/video-store-offline/style.css",
        ]),
      ),
  );
});
到此为止,安装完成。
¥That's it for now, installation done.
回应进一步的要求
¥Responding to further requests
在针对我们的 HTML 页面注册并安装 Service Worker 并将相关资源全部添加到我们的缓存后,我们几乎准备就绪。只剩下一件事要做:编写一些代码来响应进一步的网络请求。
¥With the service worker registered and installed against our HTML page, and the relevant assets all added to our cache, we are nearly ready to go. There is only one more thing to do: write some code to respond to further network requests.
这就是 sw.js 中第二位代码的作用。我们向 Service Worker 全局范围添加另一个监听器,该监听器在引发 fetch 事件时运行处理程序函数。每当浏览器向 Service Worker 注册的目录中的资源发出请求时,就会发生这种情况。
¥This is what the second bit of code in sw.js does. We add another listener to the service worker global scope, which runs the handler function when the fetch event is raised. This happens whenever the browser makes a request for an asset in the directory the service worker is registered against.
在处理程序中,我们首先记录所请求资源的 URL。然后,我们使用 FetchEvent.respondWith() 方法为请求提供自定义响应。
¥Inside the handler, we first log the URL of the requested asset. We then provide a custom response to the request, using the FetchEvent.respondWith() method.
在这个块中,我们使用 CacheStorage.match() 来检查是否可以在任何缓存中找到匹配的请求(即匹配 URL)。如果找到匹配,则通过匹配响应来实现此承诺,如果未找到匹配,则通过 undefined 来实现。
¥Inside this block, we use CacheStorage.match() to check whether a matching request (i.e. matches the URL) can be found in any cache. This promise fulfills with the matching response if a match is found, or undefined if it isn't.
如果找到匹配项,我们会将其作为自定义响应返回。如果没有,我们会 fetch() 来自网络的响应并返回该响应。
¥If a match is found, we return it as the custom response. If not, we fetch() the response from the network and return that instead.
self.addEventListener("fetch", (e) => {
  console.log(e.request.url);
  e.respondWith(
    caches.match(e.request).then((response) => response || fetch(e.request)),
  );
});
这就是我们的服务工作进程的情况。你还可以用它们做更多的事情 - 有关更多详细信息,请参阅 服务工作进程秘诀。非常感谢 Paul Kinlan 的文章 将 Service Worker 和 Offline 添加到你的 Web 应用中,它启发了这个例子。
¥And that is it for our service worker. There is a whole load more you can do with them — for a lot more detail, see the service worker cookbook. Many thanks to Paul Kinlan for his article Adding a Service Worker and Offline into your Web App, which inspired this example.
离线测试示例
¥Testing the example offline
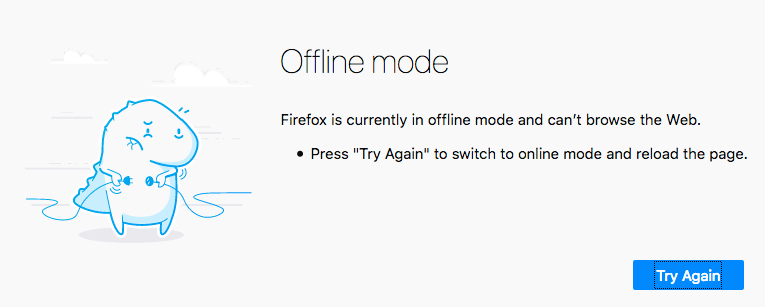
要测试我们的 服务工作进程示例,你需要加载它几次以确保它已安装。完成此操作后,你可以:
¥To test our service worker example, you'll need to load it a couple of times to make sure it is installed. Once this is done, you can:
- 尝试拔掉网络插头/关闭 Wi-Fi。
- 如果你使用的是 Firefox,请选择“文件”>“脱机工作”。
- 转到开发工具,然后选择“应用”>“服务工作线程”,如果你使用的是 Chrome,则选中“离线”复选框。
如果你再次刷新示例页面,你应该仍然会看到它加载得很好。所有内容都离线存储 - 页面资源存储在缓存中,视频存储在 IndexedDB 数据库中。
¥If you refresh your example page again, you should still see it load just fine. Everything is stored offline — the page assets in a cache, and the videos in an IndexedDB database.
概括
也可以看看
¥See also